All posts by Gerhard Marx

Psychiatrist and Woodworker

The Marking All-rounder

14/7/2014

I have a few of these Marples & sons cast steel centre bits that lost it’s centre pin (for the lack of a better term) somewhere between the late 1800’s and the present day. You might remember a post where I fashioned a so called Brace Bit Birdcage Awl from one of these bits some months ago. In the photos below you will see a centre bit that is still completely functional and one that I converted into a marking all-rounder. By this I mean a tool that is compact (can be carried around in my custom made leather shop apron) and functions as a marking knife as well as a birdcage awl. If you click on the pictures they will open up in a larger format, which should help to explain how the shape of the cutting end would accomplish the all-rounder status. I wrapped some leather around the shank for a comfortable grip.

IMG_1896IMG_1897IMG_1898IMG_1899IMG_1900IMG_1901


Stanley Bedrock no. 607 Jointer rehab

24/7/2014 This #607 Bedrock arrived today after an arduous journey across the Atlantic Ocean and the Equator. It left Ashby (Massachusetts) in the US of A on 7/2/2014 as carefully packaged by Patrick Leach. I cannot say enough good things about my dealings with Patrick so far. You can find his details on the library page of this site.

I first thought that the plane only needs it’s blade to be sharpened, but eventually succumbed to my obsession to redo it completely. I have to warn you once again that it might not be a good idea if you want to sell the plane in future, but I am not a collector and do not plan to part from this plane. The only tools that I have been forced to part with are those that got stolen over the years. TIA as they say, this is Africa.

IMG_1800IMG_1801IMG_1802

Here are some photos of the plane as I took it apart.

IMG_1812IMG_1813IMG_1814IMG_1815


IMG_1816IMG_1817


The frog screws and frog adjusting screw were a bit difficult to unscrew due to gunk and rust, but after a soaking in Q20 it could be persuaded to vacate it’s cosy abode.

IMG_1818IMG_1819IMG_1820IMG_1821IMG_1822IMG_1824

IMG_1850

29/7/2014

Today I received the frog and blades back from Kenney at the Prop Shop who bead-blasted all the gunk and japanning to Kingdom come. You will notice the blade and chip breaker of a #10 in the picture, but I am writing a separate post on that process.

IMG_0139IMG_0140IMG_0141IMG_0142


2/8/2014

This what the main casting looks like when cleaned by a professional.

IMG_1904IMG_1905IMG_1906IMG_1907IMG_1908


Masking tape before makeup.

IMG_1909IMG_1910


The rust converter coat.

IMG_1911IMG_1912


The anti-rust undercoat.

IMG_1914IMG_1915


The frog with it’s enamel paint finish.

IMG_1936IMG_1937IMG_1938


Main casting after painting.

IMG_1955IMG_1956


Japanning finished … now for the bits of metal work … flattening surfaces, sharpening blade and prep chip breaker.

IMG_1957IMG_1958IMG_1959IMG_1960IMG_1965

10/8/2014

On Friday I managed to sharpen the blades of both the #607 and #10 that I am currently working on. Then on Saturday morning it was time to reassemble the #607. Interestingly I had to shorten the frog adjusting screw in order to set a fine mouth opening. I am not sure whether this is a common issue, as it was not the case with the #606 I restored previously. The blade had a bevel angle of roughly 30º, which I hollow ground back to 25º with a very slight camber. I used a honing angle (1000 grid Ohishi waterstone) of 33º and a polishing angle (10 000 grid Ohishi waterstone) of 35º as I work mostly with exceptionally hard wood.

IMG_1966IMG_1967IMG_1968IMG_1969


IMG_1970IMG_1971IMG_1972IMG_1973


As you can see it was well worth the effort and works like a dream straight off.

IMG_1974IMG_1975IMG_1976


Stanley no.10 Rabbet plane rehab

24/7/2014

This ca. 1910 Stanley no.10 Rabbet plane arrived today after crossing the Equator and the Atlantic Ocean en route to the Land of The Brave. It is another of my acquisitions from Patrick Leach.

IMG_1804IMG_1805IMG_1806IMG_1807IMG_1808IMG_1809IMG_1810IMG_1811

Here you can see what the blade, chip breaker and lever cap looked like as I took the plane apart.

IMG_1825IMG_1826IMG_1827IMG_1828

I found ample evidence that the plane was used at some point between 1910 and 2014, as you can see.

IMG_1829IMG_1830IMG_1831IMG_1832IMG_1833IMG_1834IMG_1835

Initially I decided to only send these three parts (from my latest acquisition) for bead blasting, but then changed my mind and sent (second picture) all the blades, chip breakers, the #10’s frog and the #607’s main casting off too. (see posts entitled “Third acquisition from Patrick Leach” and “Stanley Bedrock no. 607 rehab”)

IMG_1844IMG_1863

As you can see here, the main casting lost some japanning during it’s 104 year tenure.

IMG_1846IMG_1847IMG_1848IMG_1849

During a very brief (less than 4 days) visit to Kenney at the Prop Shop it lost all of the rest of it’s japanning, rust and gunk.

IMG_0135IMG_0136

The lever cap were bead blasted and then plated with cadmium.

IMG_0145

The blade and chip breaker (left two) received the same treatment as above.

IMG_0142


I hope to get close to finishing this rehab over the next weekend. So hopefully will be able to post the rest of the drama next week.

3/8/2014

I first applied a coat of rust converter followed by an anti-rust undercoat (first picture). That was followed by three coats of black high gloss truck enamel.

IMG_1891IMG_1902

After removing the masking tape, it looked like this.

IMG_1932IMG_1933IMG_1934IMG_1935

Initially I I thought that the frog did not need the full treatment, but after try to clean it realised that it really should get the benefit of a bead-blast exfoliation. It is pictured with the #607 Bedrock (you will find a seperate post on this rehab) shortly after returning from the spa and after the rust converter, followed by anti-rust under coat and enamel paint.

IMG_1904IMG_1911IMG_1912IMG_1915IMG_1951IMG_1952IMG_1953

Starting to look like the business.

IMG_1961IMG_1962IMG_1963

Posing with the #607.

IMG_1964IMG_1965


10/8/2014

IMG_1977IMG_1978IMG_1979IMG_1980

Third acquisition from Patrick Leach

24/7/2014

My third shipment from Patrick arrived today. As you can see it contained a Stanley no.271 mini-router plane, a Stanley no.10 Rabbet plane (ca 1910) and a Stanley Bedrock no.607.

IMG_1799

I first decided not to do much more than sharpening the blade and the usual flattening of the key surfaces (of the #607), but after taking it apart my OCD kicked in. As you can see it is a plane in very good condition given it’s age (as far as I can deduct from “Patrick’s blood and gore” it should be ca 1912-1925 given the style of levercap), but I have a problem as you might know by now. Therefore the main casting were also sent off (a few days after the other bits) to Kenney at the Propshop for a beadblast-exfoliation.

IMG_1800IMG_1801IMG_1802


These babies were made between 1926-1973, but I have no idea when this particular specimen were fashioned. It is however the only member of the party that escaped my Rehab-compulsion.

IMG_1803


This is the #10 aged 113. It will receive the full wroth of my compulsive rehab-therapy.

IMG_1804IMG_1805IMG_1806IMG_1807IMG_1808IMG_1810IMG_1847IMG_1848


Custom made leather apron

2/12/2013 – I decided to take a dive into the world of hand stitching leather as I thought it could be very useful all around the workshop. Therefore I bought some beautiful cows leather from Nakara for the first project of this nature being a shop apron. Up until now I have been using an apron made by my dear wife. It worked quite well, but like with most things there were a few bits that needed improvement. Here you can see the leather.

IMG_8657IMG_8658


I found the two images below on the net, which helped me to improve the design of my apron. The first image shows Lie-Nielsen’s version of a leather apron. What I borrowed from them was the split bottom part and the belt around the waist that wraps all around the apron as apposed to only being attached to the edges of the apron. I found that it was a bit of a mission to squat with my previous apron which did not have the slit at the front. The second picture shows the x-strap design which distributes the weight of the apron better and takes it off one’s neck. This is also a part of the Lie-Nielsen design although the second picture is not a LN apron.

2-l-apron100_0660_zps7b03c830


Initially my plan was to take the bits (pictured below) of leather (already cut) on holiday to RSA and ask my mother-in-law to stitch it together with her sewing machine. This did not work as the leather was far too thick for her machine.

IMG_8659


Once back in Windhoek I made some enquiries and found an old German shop that specialises in all the tools needed to hand stitch leather. Unfortunately I did not take pictures of the process, but here is the final product.

IMG_1743IMG_1744IMG_1745IMG_1746IMG_1747IMG_1748

Stanley no. 45 rehabilitation

I bough this Stanley no 45 at an antiques auction in Groot Brak River RSA in December 2013. As you can see there are several parts missing and was painted with a thick black paint. I decided to get rid of the paint and sent it to my main man Kenney at the Prop Shop who bead blasted it to bare metal. Unfortunately I did not take a picture of this.

IMG_9622IMG_9621


IMG_9044IMG_9045IMG_9046IMG_9047IMG_9048IMG_9049


21/7/2014 Then I took it to a gunsmith who “blued” it. This is a process I know nothing about apart from it being a rust resistant treatment usually applied to a rifle’s metal parts. Now it looks a bit better and will hopefully stay looking this way for another century. I am using it as decoration on my shop’s wall due to all the missing bits. If you listen to Patrick Leach, it is not a plane you want to use anyway.

IMG_1772IMG_1773IMG_1774IMG_1775IMG_1776

My Journey 5 (The Awesome Foursome)

15/7/2014

It has been a while since I wrote “My Journey 4”, 17/7/2013 to be precise. Over the past few weeks  I started thinking about the process over the past 3 years since starting to set up my current shop. As I explained previously, I am using the shop setup phase to improve my skills and to learn as much as possible before diving into the proper cabinet making phase. Over the past three years my knowledge, philosophy and skills have undergone a major metamorphosis, predominantly as a result of all the reading, research and DVD based learning I did.

In this post I want to discuss what I consider to be the most influential characters in this process. The so called “awesome foursome”. They are (in no particular order) David Charlesworth, Christopher Schwarz, Patrick Leach and Deneb Puchalski. Let’s tackle them one by one.

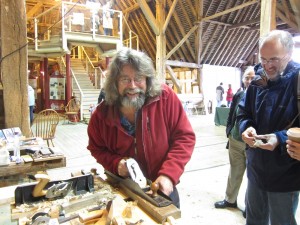
I was given five complimentary DVD’s by Lie-Nielsen as part of my first purchase back in December 2012. I could chose from their list and just happened to chose four Charlesworth masterpieces, as I did not even know who he was at that time. You will find the titles on the library page of this site. These DVDs changed the way I think about and approach woodwork in the most profound manner possible. I struggle to remember or understand why I even enjoyed woodworking prior to watching these DVDs. He single handedly opened up the ancient and mesmerizing world of hand tools, their use, care and maintenance. His dry English humour, meticulous approach and crystal clear explanations are absolutely riveting to a receptive woodworker. I say, to “a receptive woodworker”, as my wife absolutely hates it.

My enjoyment of the craft has increased tenfold since he made me aware of the quiet precision made possible by sharp, well maintained quality hand tools. His advice and techniques apply to almost every woodworking problem I have encountered since. Another key characteristic of David that changed my approach significantly is his sedate and thoughtful yet meticulous and deliberate manner. In the past I used to try and race through projects, trying to finish them yesterday and often ended up feeling unhappy with the result. Charlesworth taught me to slow down, enjoy the process and consider each move carefully before diving in. This made a profound difference in the enjoyment and quality of my work.

He is without a doubt my woodworking icon.

d charlesworth

The next guy I really appreciate is Christopher Schwarz. The first I saw of him was also a Lie-Nielsen DVD on workbenches. After watching a few Charlesworth DVDs, I enjoyed his but was not all that impressed. Since December 2012 though (when I first watched that DVD), I came across more and more of his stuff and really acquired a taste for his work. What I like about the guy is his seemingly limitless enthusiasm for the tools and history of the craft.

I then bought his two books on workbenches (which you can find on the library page of this site) and enjoyed that as much as the Charlesworth DVDs. I have now reread the books several times and am in the process of building my own 18th century bench based in large part on the advise and discussions in these two books. In December 2013 I read his book ‘The Anarchist’s Tool Chest’ and that really got me interested in his way of approaching the craft. I really like his style of writing and learned heaps about several tools I’ve not even been aware of before.

IMG_0291


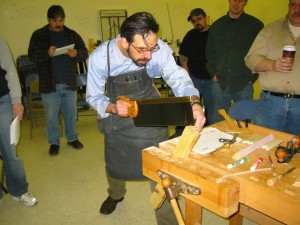
Next is Deneb Puchalski. I got to know Deneb via e-mail communication with Lie-Nielsen. He was extremely helpful from the start and over time become my go-to man when I need advice about anything. He helped when I needed advice on the best angle of attach while I built all those wooden hand planes, suggested the best blades from their collection for the various planes, and more recently he gave me advice on the best adhesive to use (in terms of open time) once I assemble my workbench. It really helps to have someone who knows what they are talking about when you are stuck. He is also very prompt with his responses, which I appreciate given that he is probably quite a busy guy.

Deneb

Last, but not least is Patrick Leach. Patrick is the owner of The Superior Works. He sells old vintage tools that he finds all over the world. Patrick has a vast knowledge of old tools and the manufacturers that used to produce these tools (and is not scared to share his knowledge). His famous work called “Patricks Blood and Gore” seems to be the most comprehensive source of information on Stanley planes available and it is free to read and download from his website. His monthly list of tools for sale is accompanied by descriptions of each tool. The information in these lists has taught me more than any other on the topic of tool history.

Patrick is helping me to find all the old tools (that I need) that is not available for sale anymore and in the process I have learnt heaps. I really appreciate having access to someone like him, while being stuck in the tool wilderness.

http://www.supertool.com/

logo


In other words I am a different woodworker as a result of these gentlemen and I am very grateful for the knowledge and different perspective they have imparted in various different ways over the past 2 years.

Shop made Melencolia square with the Marxian Improvement

14/7/2014

I first learnt about these squares from Chris Schwarz’s blog on the Lost Art Press website. He was made aware of these by Jeff Burks who noticed it in an Albrecht Dürer engraving dated 1514 (see picture below), and several other ancient woodwork engravings. It has obviously disappeared from the modern woodworking toolset, but seems very useful as a light small square that would be easier to hang on one’s apron than the modern versions.

300px-Melencolia_I_(Durero)melancholia_i_detail

Chris made some of these himself and also recently blogged on those made by Niel Cronk (pictured below). I used the ancient engravings (posted on the Lost Art Press site), Chris and Neil’s versions as a starting point for mine.

cs_melencolia_open_img_8725cronk_square1_img_9908

The first picture show how Chris used a two piece design for his handles and Neil (second picture) used a single piece. I decided to use a single piece.

cs_melencolia_stocks_img_9446cronk_square_detail_img_9911

As for the blade, I decided to use Chris’ design with a slight protrusion of the blade beyond the handle to make it easier to square the tool up post gluing and in future. He calls it the Romanian improvement as the idea comes from decorations on the pews of a Romanian fortified church in Biertan (second and third pictures). The church were constructed between 1468 and somewhere in the 16th century.

romania_square3_img_9498romanian_square1romanian_detail

14/7/2014

I found some bits of beech (for the blades) that fell off while building all those hand planes last year and a small piece of Olienhout (for the handles). I first glued an Ysterhout strip to the edge of the beech blades to make sure that the so called business end would last forever.

IMG_1668

Cutting this groove in the Olienhout handle was actually the first job I did with my Lie-Nielsen tongue and groove plane.

IMG_1720IMG_1721IMG_1722IMG_1723


In the first picture you can see the ysterhout strips on the blade stock. The second picture show how the blades were glued to the handles.

IMG_1732IMG_1733


As usual, I like to add my own twist to the design. I therefore changed the design of the handle to improve the grip for the various different ways the tool will be used. I think it also adds a bit of esthetic je ne sais quoi as well. We could call it the Marxian Improvement!

IMG_1735IMG_1736IMG_1737


I tried to illustrate how I think the design helps with grip by taking a few pictures of my own hand.

IMG_1738IMG_1739IMG_1740IMG_1741IMG_1742


Festool TS55 issue

28/6/2014

I use the Festool TS55 with the basic unit of the CMS (Compact Module System) as a table saw. One problem I seem to have on a fairly regular basis is pictured below. The sawdust does not clear adequately necessitating a proper clean, which takes up time that I would rather spend working wood. I am not using it with a dust collection system as I cannot justify the expense yet, so I guess that might be part of the problem. I am very happy in every other way with all the Festools I own. This is really the only problem I’ve come across.

IMG_1428IMG_1429IMG_1430IMG_1431IMG_1432IMG_1433

Shop made winding sticks

30/6/2014

A post on an interesting winding stick design on the Lost Art Press website, got me as far as to finally build a proper set. It has been on my list of things to do for quite some time, but given that my major project for 2014 is a 18th century workbench, there are a host of shop made tools waiting patiently to be designed and made. The first picture below shows the design that Chris Schwarz discussed in his blog last week. I liked the idea of the holes that helps to see the high corners when using the sticks looking into a light source. I have found that it becomes a bit of a challenge to see the far stick while looking towards a light source. I used a combination of the designs in the pictures below, which I found on the net.

winding1_img_965412312_winding112312_winding2


I used beech and Kershout for contrast purposes. This piece of Kershout is incredibly hard to the point were I had a hard time to plane it, even with very sharp irons. I made two beech dowels which were glued and tapped through the centre of both sticks (pictured) to make it easier to located the sticks in the middle of the board being checked for wind.

IMG_1415IMG_1416IMG_1417

Here I chiseled out small triangular areas to be filled with epoxy mixed with black acrylic paint. The idea is for the two triangles to make it easy to line up your sight down the centre of the sticks while using it.

IMG_1424IMG_1425IMG_1426IMG_1427

I used the setup below to mark out the shape of the sticks on the end grain to provide me with a guide while shaping it by means of the table saw, hand planes and sanding planes.

IMG_1434IMG_1435IMG_1436

Sticks after a confrontation involving my table saw.

IMG_1437IMG_1439

The various gadgetry I have made over the years that attach to my assembly table amde it fairly easy to shape the sticks using a #5 Bailey Jack plane and a Nie-Nielsen small block plane (based on the Stanley #102).

IMG_1444IMG_1445IMG_1446IMG_1448IMG_1447IMG_1449IMG_1450IMG_1453

Here I used the mentioned concoction to inlay the small triangles.

IMG_1454IMG_1455IMG_1456IMG_1457

The final surface preparation were done with shop made sanding planes and sandpaper on glass.

IMG_1465IMG_1466IMG_1467


A few coats of Tung oil followed by Wooddock and we have a set of je ne sais quoi-esque winding sticks. In the final picture you can see it hibernating in a custom made (by moi) leather sleeping bag.

IMG_1493IMG_1494IMG_1495IMG_1461