
3/11/2014
Now that the pressure is off, I am enjoying the woodwork more than the few weeks leading up to assembling the bench. I have now returned to my usual rhythm of tinkering here and then tinkering there while listening to some jazz. In fact my woodwork is akin to the jazz genre in that my work follows my mood on the day. This a luxury one can only afford with a true hobby. As soon as you have to generate an income out of it, the work starts dictating your mood.
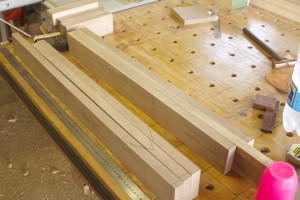
Anyway, here are two precious Assegaai (Curtisia dentata) boards being prepared for the lathe next year during the rainy season. I will use it to turn wooden dogs and thought that it would be best to do that during high humidity so that they will not get stuck at some stage. The last two pictures show the stock soaking in diesel. I could not work out whether the few signs of wood borers were active or inactive. To make sure, I gave it a diesel spa for halve a day.


Here I used the pictured tools to fit the Witpeer breadboard end. Only the two outside tenons were glued to allow the tops to move freely towards each other during times of high ambient humidity. The two inside tenons therefore also have mortises that allows space for the mentioned movement. You will also notice that I used draw pins to further strengthen the joints. It is important to remember to cut a slot (rather than a hole) for the draw pins on the inside tenons, in order to also allow for the movement.


I also started preparing stock for the two sliding “deadmen”. After much thought I dropped the idea of building the very extravagant design I originally planed. The main reason for this is to improve access to the shelve as much as possible. Therefore I thought that a simple yet solid Witpeer beam in the shape of an inverted T would work best. Here I am laminating the stock and doing some of the early prep work.


Here I started quite an elaborate process of fitting the quick release end vise and ensuring at the same time that the two ends of the twin-top are lined up perfectly.


I made a “cap” (for lack of a better term) for the bottom surface of the aprons. It ensures a better clamping surface and hides the 20 mm nuts.


