Category Archives: Lighting

Coconut shell lights

20/6/2016

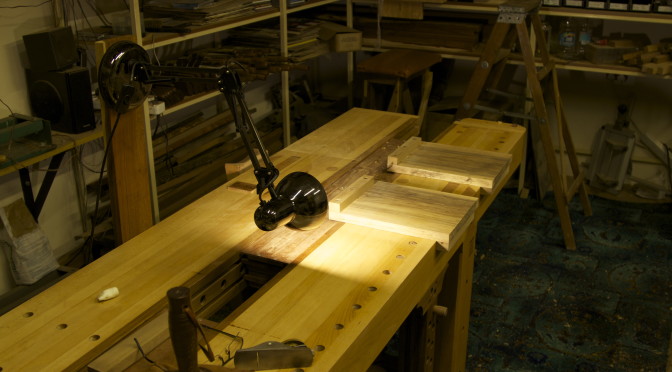
I would like to apologise sincerely for my long absence from the blogosphere. We lost our internet connection at home for several weeks which curtailed my ability to load photos to this website. I also missed out on shop time for over a month due to traveling and other challenges. At the moment though, I am back in action working on several exciting projects.

As you might remember from a previous post, we had a wonderful week in Thailand some months ago. We picked up a whole heap of coconut shells in Ying’s (our cooking class teacher) backyard. They were then smuggled in our luggage via Hong Kong back to Namibia. A few of them were damaged during the arduous trip, which I then turned into spoons. The rest were lined up to become lights.

It is quite a mission to get rid of the fibrous material on both the in and outside of the hard shells. I used the wire bits pictured to do just that.

IMG_6938IMG_6929IMG_6999IMG_6996IMG_6997IMG_7000IMG_7001

For the other halve of the light I used empty tin cans from household use. The big hole is for the light fitting.

IMG_7002

The cans were then snipped into four strips to allow it to flare open.

IMG_7010IMG_7011

Each of the four strips are attached to the edge of the coconut shells with one self-tapping screw.

IMG_7004IMG_7005

In order to allow light to shine through the shells I drilled sets of “carefully messed up” holes. The inspiration for this is Aboriginal art from Western Australia that I saw many moons ago while at a Congress in Perth. As I am sure you can imagine, this took ages to accomplish.

IMG_7012IMG_7013IMG_7015IMG_7016IMG_7017IMG_7018IMG_7019IMG_7022IMG_7023

One coat of Woodoc enhanced the beautiful natural colours of the shells.

IMG_7033

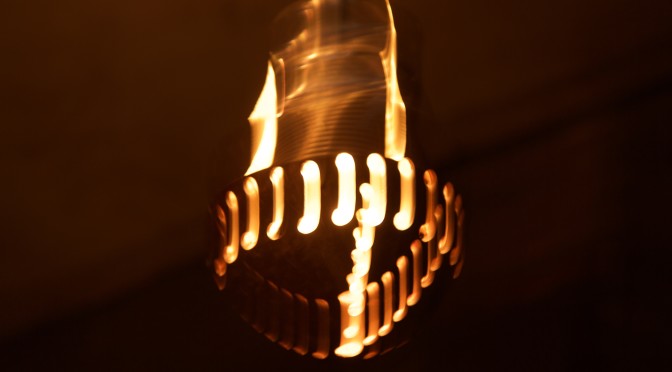
I decided not to include any photos of how the lights were wired up as it might become a legal liability for this website, not to mention the myocardial risk in might impose on people like Jonathan White. So here they are hanging off the roof of our Shebeen called “Wamboland”  located in the backyard.

IMG_7044IMG_7046IMG_7045IMG_7404IMG_7406IMG_7407

An accidental arty photo.

IMG_7403

As an added bonus I include a few picks of super hot Namibian chicks hanging out at the Shebeen a while ago. If some of the photos are less than perfect it is because they were not able to keep still for long enough given the slow shutter speed in such a low light setting. Certainly not as a result of anything to do with the photographer!!

IMG_7039IMG_7053IMG_7054

… and there was light.

14/4/2015

Since my bench was finished a month or so ago, it has been a struggle to see what I am doing as it is located in a part of the shop which is devoid of light. Recently I bought this basic study lamp and attached it to a short board to improve it’s maneuverability. Here are a few pictures to show how it lightens up my life.

IMG_4023IMG_4025IMG_4041

Clamping it to the bench enables me to have it hanging over the bench’s edge.

IMG_4039IMG_4053

It can also be clamped in the twin screw vise, legvise or my sliding deadman-cum-legvise. This helps to set it up as a raking light (second and third photo).

IMG_4138IMG_4139IMG_4140IMG_4141


It is incredible how much more accurate every aspect of my work has become since using a simple bench light. It is highly recommended.

Extremely Efficient Effulgent Arm (EEEA)

This post will document one of the easiest projects that can make a huge difference in your enjoyment of the craft as well as improve the accuracy and safety. My eyesight is deterioration with age so good lighting makes a significant difference when doing precise work. For this reason I decided to build an arm that can swing across my assembly table with a spot light and a power point.

I took some scrap angle iron and one of those hinges used in metal work. From this I welded a short arm and a part of the hinge became a hook that can be bolted to the wall to make the arm easy to remove.

100_0304100_0305

A quick coat of anti-rust paint and BYU (Bob’s your Uncle).

100_0309100_0308100_0307

In order to give the arm some more reach, I laminate some pieces of plywood as it is strong yet lightweight.

100_0306

Prior to shaping this part of the arm on the tablesaw I screwed another thin strip of plywood to it’s top section. This was meant to become the removable lid covering the electrical wires running inside.

100_0311100_0313

After the shaping process I cut the dado meant to house the wires. In the picture below you can see it with the lid unscrewed.

100_0314

Next I fitted a multi-plug to the side of the arm with it’s wire running in the dado as shown above.

100_0327100_0328100_0329

The multi-plug wire was connected with an extension inside the arm as shown.

100_0330100_0331100_0332

The extension was fitted with a plug at the hinge end of the arm. This design feature was again aimed at making it easy to remove the whole arm if I need to work on it or for some reason have to get it out of the way.

100_0334100_0335100_0336100_0337

Next I added a desk lamp to act as a spotlight on the extreme front of the arm. It is one of those that clamp (with an integral spring clamp) to the side of a desk or table. I screwed it on to keep the clamp available for another task. As you can see from the pictures it has it’s own switch and is plugged into the multi-plug.

100_0338100_0523

If one would to be able to look at this setup from the ceiling, the arm swings across the table with an arc similar to the crude drawing below. Therefore covering any particular area that is in need of enhanced lighting.

Boom arm swing

Then I added a small but bright fluorescent light to the bottom of the arm. Together with the spot light it really improves the lighting of a particular part of the assembly table by swinging it there. In the pictures below you can also see another function of the arm as provided by the spring clamp of the desk lamp. I took one of my Festool power-cords, plugged it in at the multi-plug and clamped it in the mentioned clamp. This way it is always in easy reach, yet completely out of the way.

IMG_6797IMG_6798


Finally, a few pictures to show how the Festool cord and multi-plug adds value. The nice thing about the Festool cord is that it fits all the Festool appliances. In my case a router, a Domino and a circular saw (as pictured).

100_0541100_0573100_0576