My 18th Century Workbench in progress 23

27/10/2014

I started chopping off the tentacles created by the protruding through-tenons locked in place with wedges and the draw pins. I used my newly acquired Disston no. 12 (ca 1896-1917), which has not been restored completely. I tried to saw off the first tentacle, but found that the saw could do with a sharpening. After that it performed admirably. You will notice that one saw nut is missing as I quickly put the saw back together for this job. I want to clean up the handle and do more work on the blade before finally reassembling it for years of excellent work.

The next tool used is also a rehabilitated old timer. The Bedrock no. 606 was used to plane the end grain flush to the surface of the bench.

IMG_2494IMG_2495IMG_2496IMG_2497IMG_2498IMG_2499IMG_2500IMG_2501IMG_2503IMG_2504

I thought it might help in future when observing wood movement in the bench to document what the ambient humidity was around the time the bench was assembled. It remained very stable over the past 4 months ranging between 27-30%.

IMG_2502

The bench was then turned on it’s side to get at the stretcher and apron tenons.

IMG_2505IMG_2506IMG_2507IMG_2511IMG_2519IMG_2520IMG_2521IMG_2522


Once that was done, I started fitting the shelve. You will remember the Kaapse Swarthout (Maytenus peduncularis) boards I prepared some time ago for this purpose. The cleats were made up of Tasmanian Blackwood (Acacia melanoxylon) grown in the Knysna forrest. The shelve boards were addressed with my Lie-Nielsen tongue and groove plane before cut to final length. You can see how I made slots for the screws


IMG_2523IMG_2524IMG_2525IMG_2526IMG_2528IMG_2538IMG_2539

In an earlier post I mentioned that the drawpin holes are not staggered as one should do. Mine are in the same plane. This for technical reasons to do with the design of my tenons. The way I got around this problem was to tap in drawpins that were in the order of 100 mm from the business end and a shorter one (pictured) from the other end to make it look as if they run all the way through the leg.

IMG_2508IMG_2509

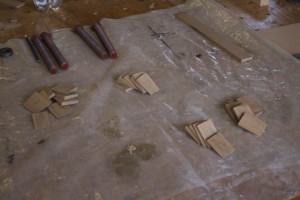
Each tongue and grooved shelve board were fixed to the cleat with two traditional wood screws sitting in a slot that allows for plenty of wood movement.

IMG_2563IMG_2557IMG_2558IMG_2559IMG_2560

The kids helped to assemble the shelve and clearly enjoyed the finished product.

IMG_2567IMG_2568IMG_2569IMG_2570IMG_2571IMG_2572IMG_2573

Now I will turn my attention to the legvise. You will find the pictures and write-up in the post entitled “My 18th Century Workbench in Progress 18”

http://www.jenesaisquoiwoodworking.com/my-18th-century-workbench-in-progress-18/

IMG_2574IMG_2575IMG_2576

My 18th Century Workbench in progress 22

12/10/2014

The bench was finally assembled on Sunday 22/10/2014!!!

We managed to do the glue-up in two very stressful hours between 15h30 and 17h30, after working under the gun all weekend to get the last prep work done.

At the beginning of the week I drew up a list of the most important bits to get done before assembly, which was scheduled for Sunday. As you can see it is a curious eclectic ensemble of Afrikaans and English.

IMG_0172IMG_2393


Early in the week I made these custom 20 mm bolts, which will fix each of the two parts of the twin-top to the aprons in two places.

IMG_2308IMG_2309IMG_2310IMG_2311IMG_2312IMG_2317IMG_2318IMG_2313IMG_2316IMG_2319IMG_2320IMG_2321IMG_2325IMG_2327IMG_2326IMG_2328


This is the board of Assegaai I transformed into drawpins. The process is documented chronologically in the pictures. Curtisia dentata is especially well suite to use as draw pins due to it’s characteristics of being extremely tough, strong and elastic. Dry Assegaai also shrinks less than most other wood, which is why it was the preferred wood to use for wagon wheel spokes in the Old Cape Colony.

IMG_2303IMG_2330IMG_2331IMG_2332IMG_2333IMG_2334

IMG_2351IMG_2352IMG_2353IMG_2357IMG_2358

IMG_2377IMG_2366IMG_2367IMG_2378IMG_2379IMG_2368IMG_2380IMG_2381

Some handcut Witpeer wedges to lock the through-tenons permanently in place.

IMG_2336IMG_2337IMG_2354IMG_2355

The tenons of the long stretchers ended up looking like this, shortly before being glued into place for ever (I hope).

IMG_2374IMG_2375


The final dry run went very smooth. I expected something to not fit perfectly, but for a change it was not the case. You can see how my wife and friend Siegmund Mengersson (who happened to be around) helped, as this is not a one man job.

IMG_2338IMG_2339IMG_2340IMG_2342IMG_2343IMG_2344IMG_2346IMG_2348IMG_2350


We then took the whole thing apart and took a few photos with the whole family. The reason being that the whole family spent the weekend wondering in and out of the shop.


IMG_0182IMG_0180IMG_0181


Then on Sunday afternoon we mixed the epoxy (discussed in an earlier post) and raced through 2 hours, which felt like 15 min. We only just managed to get the job done within the recommended 2 hours open-time of this particular epoxy adhesive.

What impressed me most was how the Assegaai drawpins closed up the shoulders of the aprons and stretchers. We used clamps to take the stress off the pins while hitting them home, but could visually see how they tightened up the joints. We removed the clamps immediately after and the joints stayed perfectly tight and closed up.

What worked particularly well, was the 13 mm x 150 mm drawpin that was tapped through the sliding-dovetail-through-tenon into the top. These did not need any assistance from clamps. It simply pulled the leg into the top as if they were made out of the same piece of timber. I have never seen this method used for the mentioned joint, but I can really recommend it (from this case study of one).

IMG_2394IMG_2395IMG_2396IMG_2397IMG_2398


A few pictures of an exhausted yet relieved wannabe-18th-century-woodworker, his heir and the object of his toil since the 2nd of February 2014.

photo 1photo 3photo 4

It is done!!!

12/10/2014

Well, not quite, but it is glued up!!! And that before the humidity changed. At 15h30 on the 12th of October 2014, my wife and I started assembling the bench. It was a very stressful 2 hours, but now I can relax and work at my usual leisurely pace.

I will soon have some better photos, but here are a few to wet the appetite.

photo 1photo 3photo 4


My 18th Century Workbench in progress 21

6/10/2014

I really do hope that this will be the last post that does not include a picture of the assembled bench. I am starting to get a bit worried that I might not be able to get it assembled before the major changes in humidity. To give you an idea, the ambient humidity in my shop change from around 25-30% in winter to 75-80% during the rainy season.

Here you can see how I fitted the legvise hardware to the leg that will play host to the mentioned vise.

IMG_2237IMG_2260IMG_2261IMG_2262IMG_2263IMG_2264IMG_2267IMG_2265IMG_2266

The next task was to do some of the preparation work to eventually fit the breadboard-end. The rest of this process can only be done once the bench is assembled for the (hopefully) final dry run.

IMG_2259IMG_2251IMG_2252IMG_2253IMG_2254IMG_2255IMG_2256IMG_2257IMG_2258

This piece of Ysterhout was processed as pictured to become the planing stops. You can also see how I marked out and chopped the holes in the top to accommodate them. My cousin, a Urologist from Cape Town, did the final tidying up of the two orifices. He seems to have a particular talent when it comes to an orifice.

IMG_2155IMG_2273IMG_2274IMG_2275IMG_2276IMG_2277IMG_2278IMG_2279IMG_2280IMG_2281IMG_2282IMG_2283IMG_2287IMG_2288

While he was perambulating the two orifices, I started fitting the long stretchers to their legs.

IMG_2295IMG_2296IMG_2297IMG_2298IMG_2299IMG_2304IMG_2305

Here I just finished excavations for the end vise to be fitted.

IMG_2300IMG_2301IMG_2302IMG_2306IMG_2307

Shop made Ysterhout straight edge

16/9/2014

I have been looking for a suitable piece of timber to use as a straight edge for a while now. A few weeks ago I found this piece of Ysterhout that has been kicking around the shop for the past three years. I did not even consider Ysterhout as an option as it is not particularly stable in my experience. When I picked up this piece while ferreting around for a suitable piece of Witpeer, I saw that it was dead straight with grain to match. It is the piece on the right in the picture below.

IMG_2176

I planed it down to a thickness of a ½” over the coarse of several days and it stayed dead straight. The design I chose has the specific purpose of exposing as much end grain as possible in an attempt to help the timber to adjust to changes in ambient humidity in no time.

IMG_2186

After shaping it as pictured, I left the straight edge for a few days before fine tuning the business end.

IMG_2268IMG_2269

A coat of Tung oil finished the job.

IMG_2270IMG_2271IMG_2272