Category Archives: Quick projects

Coconut shell lights

20/6/2016

I would like to apologise sincerely for my long absence from the blogosphere. We lost our internet connection at home for several weeks which curtailed my ability to load photos to this website. I also missed out on shop time for over a month due to traveling and other challenges. At the moment though, I am back in action working on several exciting projects.

As you might remember from a previous post, we had a wonderful week in Thailand some months ago. We picked up a whole heap of coconut shells in Ying’s (our cooking class teacher) backyard. They were then smuggled in our luggage via Hong Kong back to Namibia. A few of them were damaged during the arduous trip, which I then turned into spoons. The rest were lined up to become lights.

It is quite a mission to get rid of the fibrous material on both the in and outside of the hard shells. I used the wire bits pictured to do just that.

IMG_6938IMG_6929IMG_6999IMG_6996IMG_6997IMG_7000IMG_7001

For the other halve of the light I used empty tin cans from household use. The big hole is for the light fitting.

IMG_7002

The cans were then snipped into four strips to allow it to flare open.

IMG_7010IMG_7011

Each of the four strips are attached to the edge of the coconut shells with one self-tapping screw.

IMG_7004IMG_7005

In order to allow light to shine through the shells I drilled sets of “carefully messed up” holes. The inspiration for this is Aboriginal art from Western Australia that I saw many moons ago while at a Congress in Perth. As I am sure you can imagine, this took ages to accomplish.

IMG_7012IMG_7013IMG_7015IMG_7016IMG_7017IMG_7018IMG_7019IMG_7022IMG_7023

One coat of Woodoc enhanced the beautiful natural colours of the shells.

IMG_7033

I decided not to include any photos of how the lights were wired up as it might become a legal liability for this website, not to mention the myocardial risk in might impose on people like Jonathan White. So here they are hanging off the roof of our Shebeen called “Wamboland”  located in the backyard.

IMG_7044IMG_7046IMG_7045IMG_7404IMG_7406IMG_7407

An accidental arty photo.

IMG_7403

As an added bonus I include a few picks of super hot Namibian chicks hanging out at the Shebeen a while ago. If some of the photos are less than perfect it is because they were not able to keep still for long enough given the slow shutter speed in such a low light setting. Certainly not as a result of anything to do with the photographer!!

IMG_7039IMG_7053IMG_7054

Firewood trays

9/11/2015

This project is really not much to write home about, but the reason why it is significant to me is that it is the first that my son and I worked on together. He seemed to enjoy it and managed to stay interested and focused on the task for quite a few hours at a time. What surprised me was how much it sped up the progress as I have been working all by myself for so many years now. What would have taken me a whole day were polished off in an afternoon.

Anyway, back to the actual project. I wanted to build two monster trays to house the firewood at our beach house. It used to be a constant pain in the butt, having to crawl underneath the braai to grab more wood for the fire. I used two sheets of plywood and recycled Meranti for 90% of the project.

IMG_5441IMG_5442

This is what the Meranti looked like before we got stuck into it. There is an interesting story around this Meranti, which is one of the reason why I chose to use it for this project. A good friend of mine works as a contrator in the building industry here in Windhoek. He was doing some work for a government department renovating/refurbishing a house just around the corner from us. According to the officials the house was being renovated to act as an official abode to the Father of the Nation himself, during times he decides to spend time in the capital. For those of you who are unfamiliar with Namibian Politics, I am referring to Sam Nujoma.

Seeing that it was a fairly comprehensive refurbishment, all the old fixed cabinetry were removed. The Meranti used to serve as the framework of some of the original built in cupboards. The house was probably built some time during the late 1960’s or early 1970’s, which means that it is pretty stable by now and is quite clearly of a much higher quality than what we can buy around here these days.

As you can see it was painted, which I removed by planing it after all the screws etc were removed.

IMG_5456IMG_5457

16/11/2015

My Lie-Nielsen twin screw vise came in very handy while cutting a few wide (or possibly ‘lazy’) finger joints.

IMG_5458IMG_5459IMG_5460IMG_5461IMG_5462IMG_5463IMG_5464IMG_5465IMG_5467

30/11/2015

Here we are doing the first assembly.

IMG_5497IMG_5498

One thing that is now well and truly part of my essential woodworking paraphernalia is this Tomato paste tin. I always keep some oil in there to dip wood screws in before driving (cleverly avoiding the alternative way of expression which would not be acceptable on a ‘family website’ like this) them home with a Yankee ratcheting screwdriver. It makes a world of a difference as a result of the lubricating qualities (treading on thin ice here) and probably has some beneficial effect in preventing corrosion.

IMG_5500IMG_5499IMG_5495IMG_5494IMG_5496IMG_5536IMG_5537

The wife (you see, it really is a ‘family site’) chipped in by helping to apply a layer or two of Woodock.

IMG_5538IMG_5539

7/12/2015

IMG_5574IMG_5575

8/12/2015

The boat acted as our trailer on the 1860 km journey south. The parts were packed after it received two layers of finish.

IMG_5594IMG_5596

11/1/2016

Once at our destination, Didi and I reassembled the trays and rolled then into position underneath the fireplace.

IMG_5737IMG_5738IMG_5739IMG_5740IMG_5741

I hope this is the first of many projects I have the privilege to work on with the kids.

The carver in me

11/1/2016

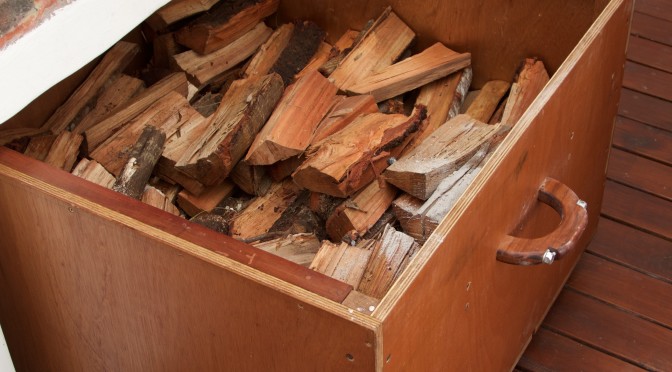
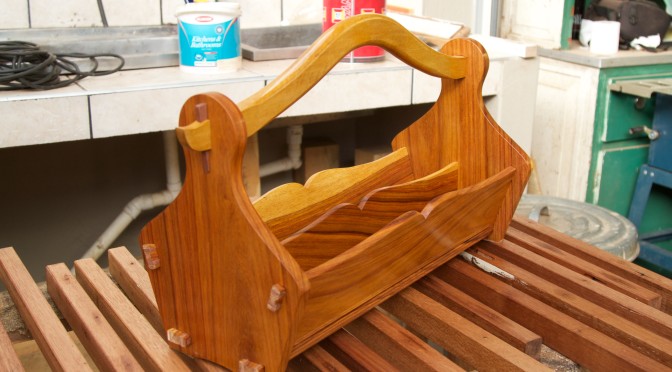
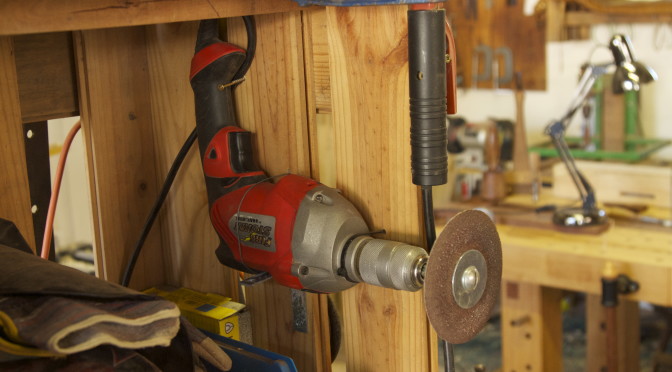
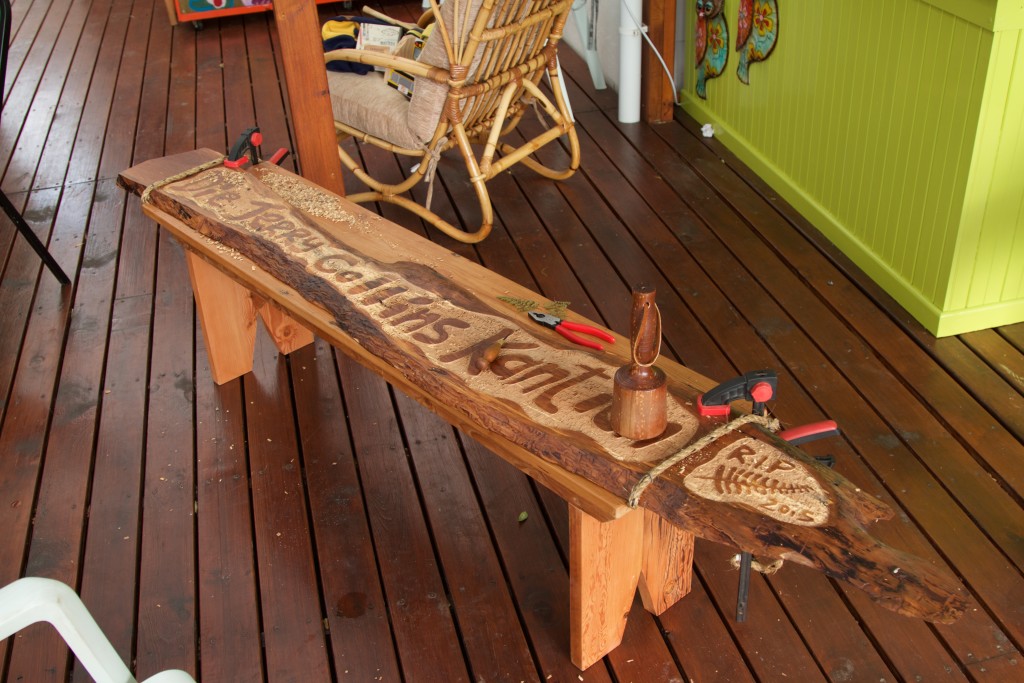
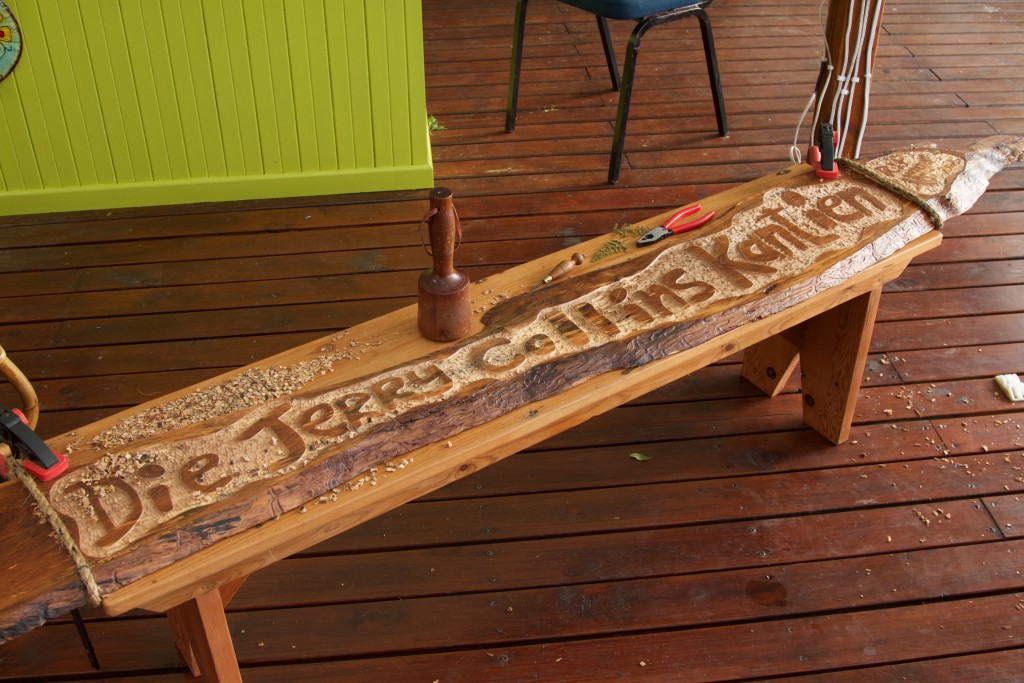
During the December holidays I did pretty much no woodwork. I spent some time trying to find old tools (which is the topic of an upcoming post), but that was about it. That is apart from finding my inner carver, for lack of a better term. One day I decided to take this piece of Kaapse Swarthout (also known as Cape Blackwood or Maytenus peduncularis) down from where it was hanging above the little bar. I took a crappy Eclipse chisel and carved out the new name of the bar.

One of my all-time favourite All Blacks is Jerry Collins. He sadly died last year. I decided to name the bar after him as a final tribute, because he personifies lots of values I hold dearly. Translated into English it goes “The Jerry Collins Bar” The Afrikaans word I chose for bar is a tribute to an aunt of mine. “Kantien” is an old word that is not used very much at all anymore. She used to get very upset with her son and I for going out to drinking spots on a regular basis while on holiday from medical school. She would berate us for our immoral behaviour and always added that she and her husband have never even been to a “Kantien”. Today he is a Consultant Urologist and I am a Psychiatrist as you know. Tannie Kowie is a real legend in her own right and exhibits many of the same ethics and values that I admire in Jerry Collins.

IMG_5734IMG_5735IMG_5736

It just so happened that my best mate from school pitched up with his family on the day I finished the carving. It was an ideal way to inaugurate the bar as Gerdie Smook has a lot to do with my former love for the game of rugby. I say former because the way the Springboks play has finally caused a major allergy for the game in my particular case.

IMG_5747

The reason why I have so much respect for Jerry Collins is due to the way he approached the game. He played and approached the game with a set of ethics that reminds of the spirit of the game I fell in love with as a young boy. Unfortunately that spirit has almost completely disappeared from the professional version of it over the past 10 years. If anything remains of it, it is in Aotearoa the Land of the Long White Cloud.

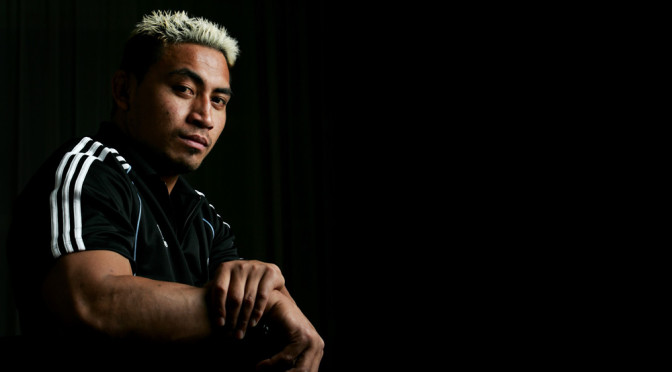
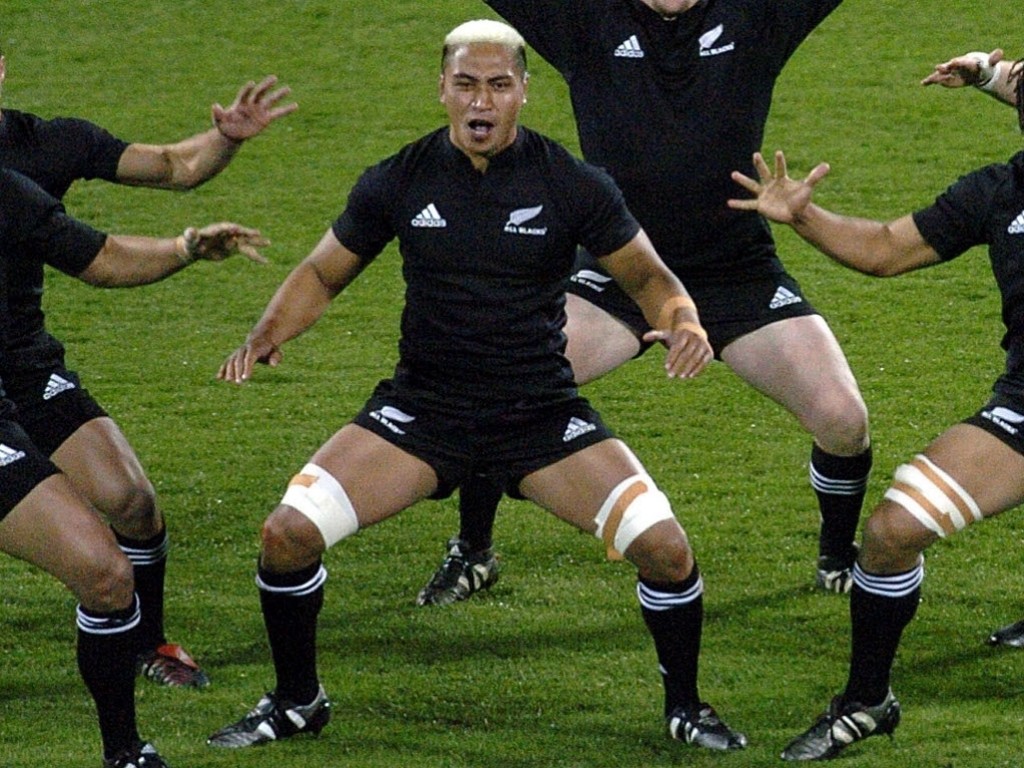
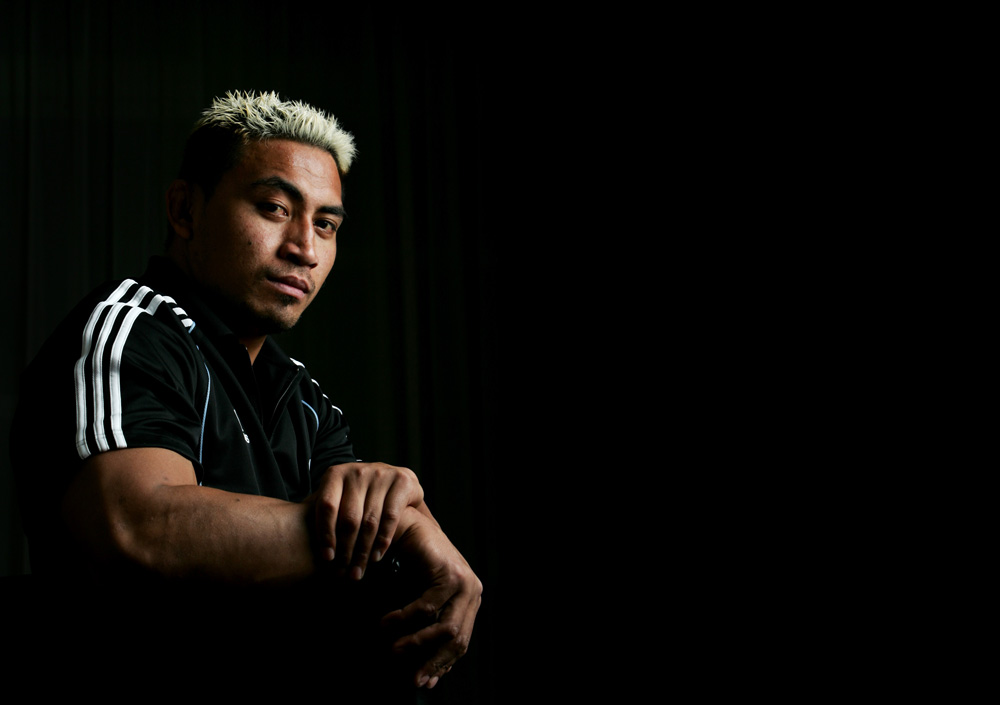
What follows is a short tribute to the late great Jerry Collins.

Here you can see “Topdeck” doing the Haka. Do you see any resemblance.

1022.6666666666666x767__origin__0x0_Jerry_Collins_Haka1380276561268

Apparently Jerry was told by Sir Greame Henry at some stage that he would struggle to keep his spot in the All Blacks team if he does not improve his distribution skills. Jerry went away, worked very hard at it and became so good at it that the AB’s won two tests in the dying seconds off the back of an exquisite Collins last pass.

1845304-jerry-collins-avec-le-maillot-des-all-950x0-3

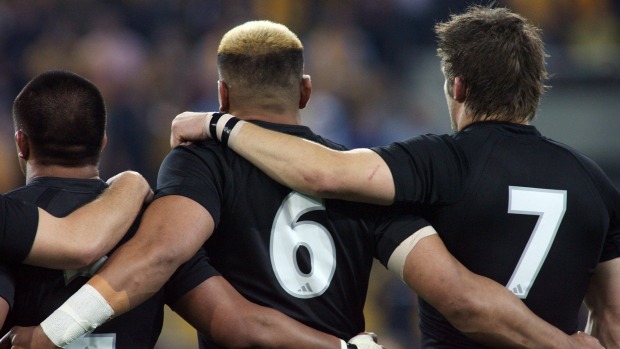
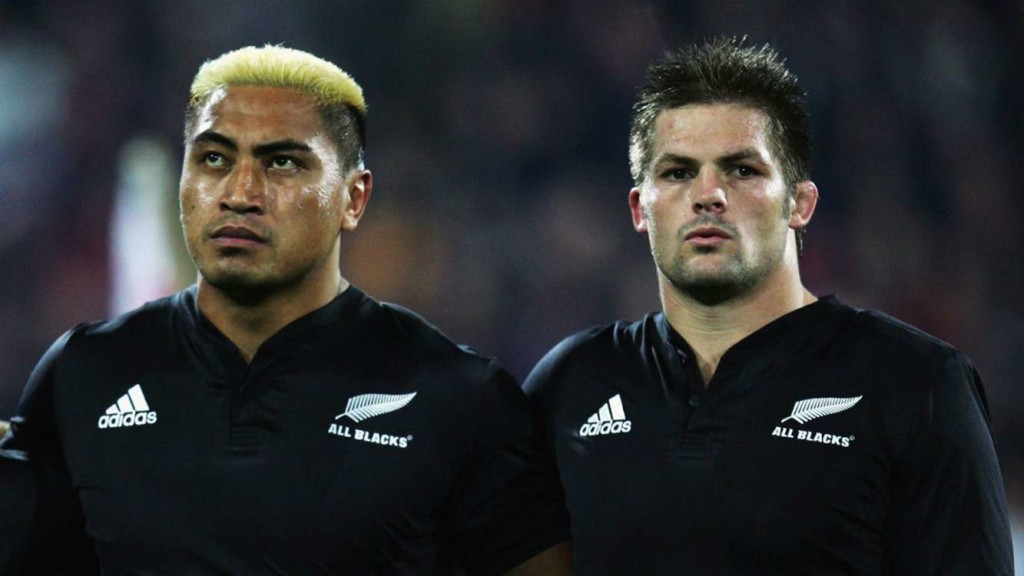
With Richie Mccaw he formed arguably one of the best (if not the best) 6-7 combination in the history of the game.

1433608748164collinsmccaw-cropped_12c3tkgfa16211kbe6tb5dddc2

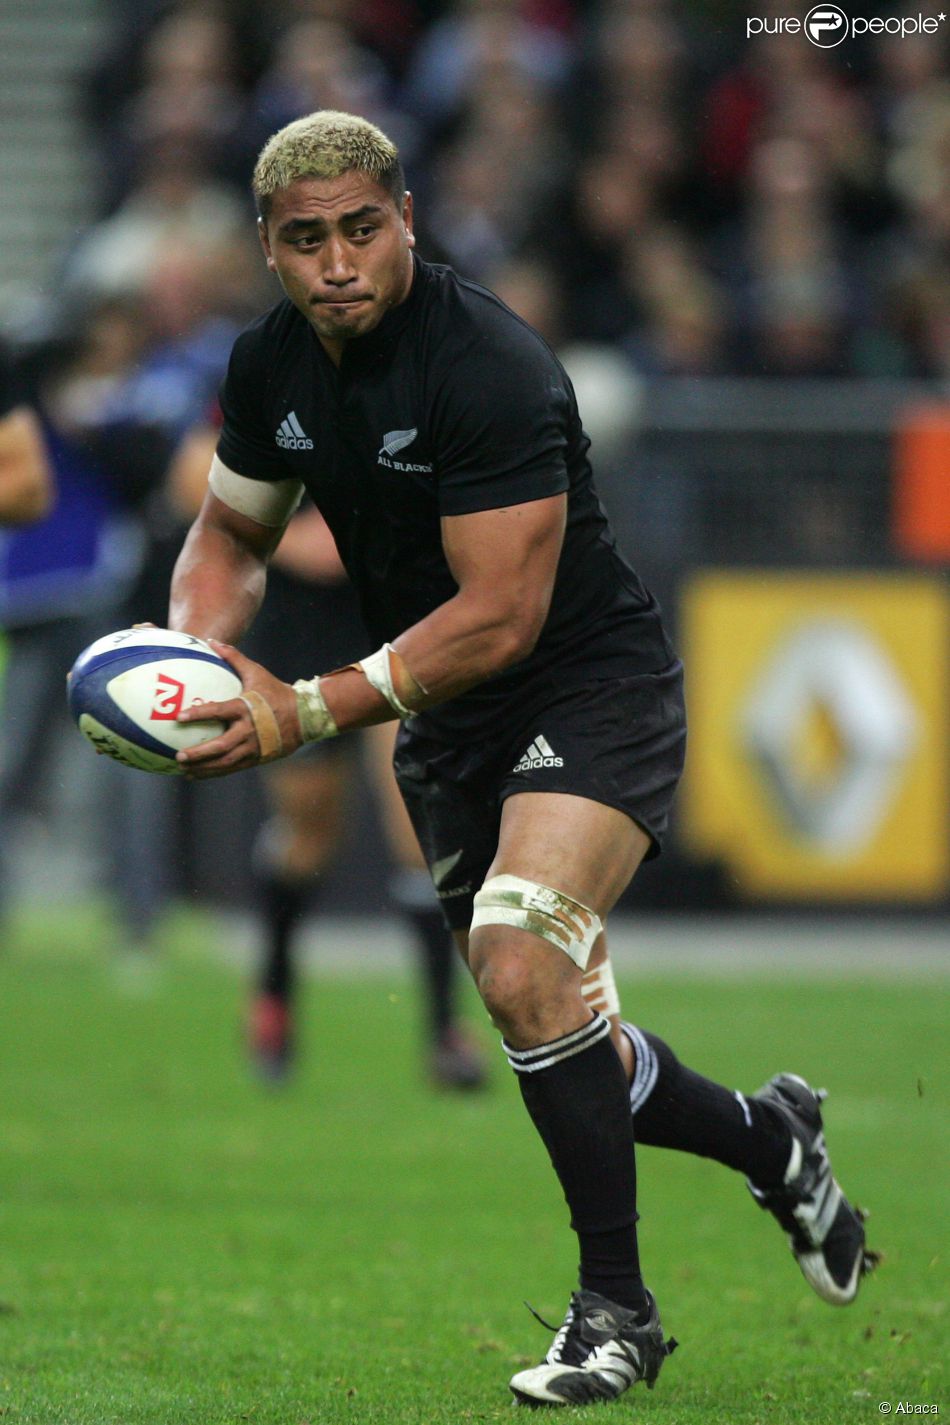
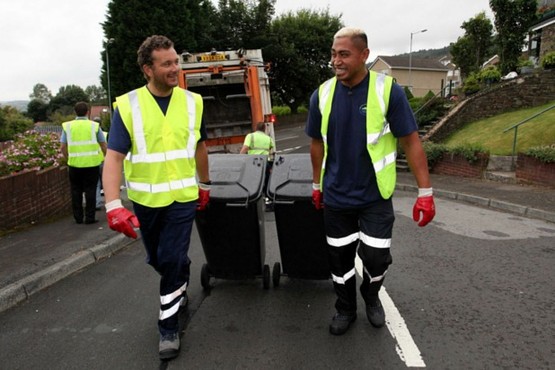
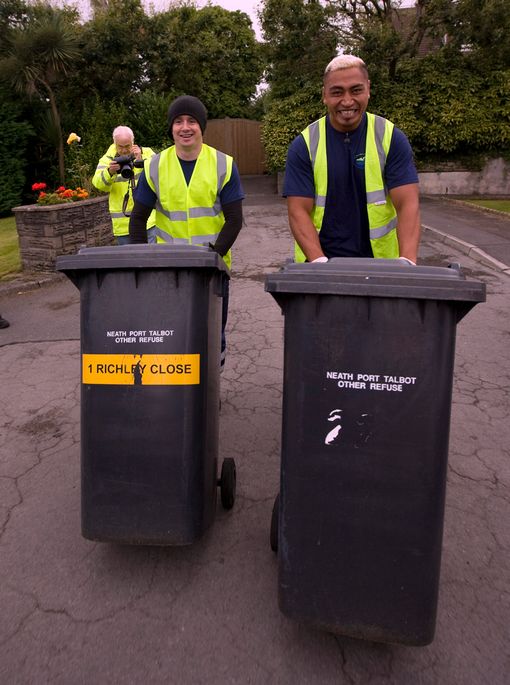
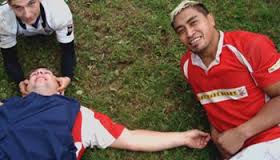
One of my favourite Jerry stories is that he (apparently) continued his day job as a rubbish collector well into his very well paid professional rugby career. He did that because he wanted to keep the fitness it gave him. In New Zealand those guys run all day. That is the sign of a man who has his feet firmly on the ground, not allowing fame to change who he is. (The pictures below was take in Wales while he was playing there, not in Wellington NZ where the above story transpired)

102158422816522

For the next story I will cut and paste from an article in the Telegraph.

Collins was in Devon on holiday after the New Zealand’s surprise quarter-final defeat at the hands of France at the 2007 World Cup. Strolling down the high street, the flanker was spotted by Barnstaple’s then director of rugby Kevin Squire. A photo opportunity turned into a conversation and then an invitation to come down to watch the club in action.

“I said it would be lovely if he could come down to the club and thought nothing of it,” Squire told Telegraph Sport. “Unexpectedly there he was three days later. He watched a first team game and then I introduced him to all the players.

“One of the guys I introduced him to was the Under-13 coach at the club. Consequently in that conversation he was invited to do a training session for the kids, which he astonishingly agreed to do. The following Friday night I went down to watch the training session and the kids obviously were in heaven.”

Then came perhaps the most bizarre debut in rugby history when just a couple of weeks after playing in a World Cup quarter-final, the back-row forward turned out for Barnstaple second XV against Newton Abbott in a Devon Merit Table clash. Collins had asked Squires for run-out but registration regulations prohibited the then Hurricane from appearing for the first XV.

“Again, I never thought he would actually turn up, but there we were waiting for the bus and Jerry shows up after going into town to buy a pair of boots,” Squire said. “By the time we had got to Newton Abbott there had been all sorts of messages between the players and they thought we were bringing a lookalike down with his distinctive white top. It didn’t take long for everyone to realise that it was the real deal. Then their jaws hit the floor.”

As befitting a man with the alternate nicknames of “the Hitman” and “the Terminator”, Collins was renowned for the force of his tackles and even playing at half speed still rattled the bones of a few Newton Abbott players as well as scoring a try.

“He was terrific,” Squire said. “He made everyone in that team feel like they were on the same level as him. The guys from Newton Abbott enjoyed it just as much as our guys did.”

News quickly spread of Collins’ appearance and he would face a disciplinary panel and a fine when he returned to New Zealand for playing without his employers’ permission. He later told Squire that it was worth every dollar.

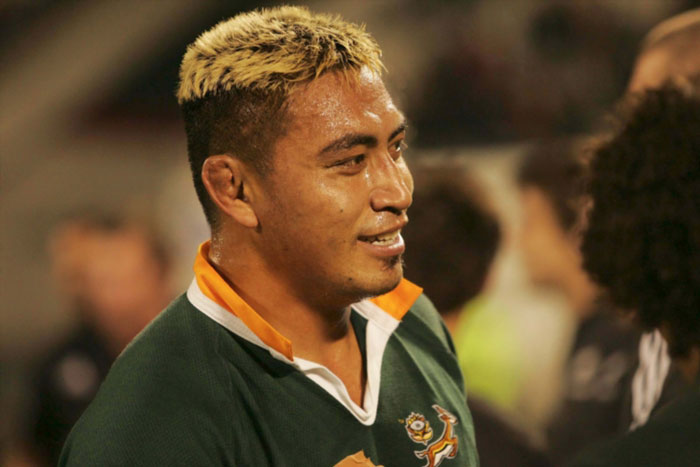
Nor was the end of the association between Collins and “Barum”. A few weeks later Collins turned out for the Barbarians against South Africa, the world champions, wearing Barnstaple socks. “That was his idea,” Squire said. “Everyone in the club had a lump in their throat when he ran out at Twickenham wearing our socks, particularly when the commentator said ‘there’s Jerry Collins, New Zealand and Barnstable Rugby Football Club.’ ”

On Boxing Day 2007, Collins, now playing for Toulon, returned to watch the annual derby against Bideford. “Jerry said he’d be there for the game,” Squire said. “He was in France at the time but he honoured his promise to come over for the game.

“That led to another great night out. Irrespective of the rugby, he was a fun guy who was so down to earth. The world of rugby has not just lost a great player but a great person. It is as simple as that. What he did for Barnstaple will never be forgotten.”

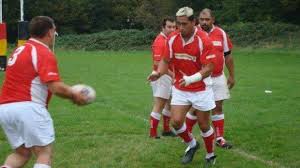
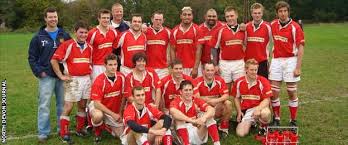
Here are a few pictures of the Barnstaple tale.

????????????????????????????

download

download (1)

images

Proudly wearing his Barnstaple socks, while playing for the Barbarians against the Springboks.

Jerry Collins of the Barbarians. Barbarians v South Africa, Twickenham, Rugby Union, 1/12/2007. © Matthew Impey / Wiredphotos.co.uk . tel: 07789 130 347 e: matt@wiredphotos.co.uk

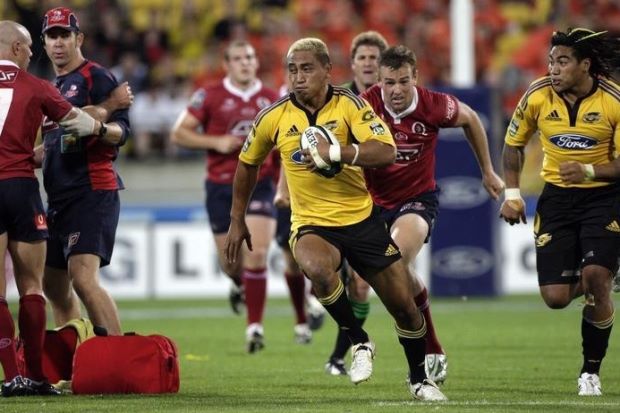
One night I will never forget was when I took my father-in-law who was visiting from South Africa to a game at the Cake Tin in Wellington NZ. The Hurricanes was playing the Sharks and Jerry was coming back from injury. He therefore only featured for 40 odd minutes before being replaced. The Hurricanes thrashed the Sharks by quite an embarrassing margin. While hanging around the stadium waiting for the worst of the spectator traffic to ease, out came Jerry with the rest of the team back onto the park. It was raining as only Wellington can, but Jerry led a brutal fitness session running his teammates until they dropped.  This is absolutely unheard of in professional rugby.

Jerry also got into trouble on more than one occasion with the All Black management for rocking up and playing club games on a Sunday after playing a test for the All Black on the Saturday. Now that is the spirit the game has lost.

20150605T054647Z_1_LYNXMPEB5406Q_RTROPTP_3_RUGBYSUPER

What would I have given to see him playing in this jersey. I would actually settle for seeing a different player with the same attitude and spirit, but no such thing exists in South Africa anymore.

TL_652674

So that is why the bar received the name it did. Thanks Bro, your example continues to inspire.

Jerry-Collins-1

Japanese toolbox inspired knife and fork carrier – part three

30/11/2015

This will be the final post in this epic series. I am currently experimenting with Japanese joinery and find it very refreshing. I think that it is growing on me and might therefore become an important element in how I design future pieces.

In the picture below you can see how I chopped the through mortises in the handle, which will accommodate two wedges.

IMG_5480IMG_5482

The only parts that were glued were the centre divider into a very shallow dado in the base (as pictured below) and the small wedges that the through tenons received (see later in the post). The two end pieces in the picture below is simply keeping the centre divider in position while the glue cures.

IMG_5481

I used this small Sargent smoother (their equivalent of a no. 2) for the final finishing of the surfaces.

IMG_5483

This was my first time using shellac and it was a real pleasure. In our climate these flakes dissolved in about 20 minutes!! I saw craftsmen from colder parts of the world suggest that you leave it over night. A guy I met in a tool shop in Johannesburg told me that one can dissolve the shellac in “Blou Trein” (or methylated spirits) as I could not find “denatured alcohol” in Namibia or RSA. For some reason the the blue colour has no effect on the finish?? I do not understand how this works, but it does.

IMG_5484IMG_5485IMG_5486IMG_5487IMG_5489

Custom made wedges.

IMG_5504IMG_5505

Wedge slots.

IMG_5506IMG_5507

I used a feeler gauge to work the Titebond into the wedge slots before driving the wedges home with my shop built plane hammer.

IMG_5517IMG_5508IMG_5510IMG_5511

As so.

IMG_5512IMG_5513IMG_5514IMG_5515IMG_5516IMG_5518

So there you go, Bob’s your uncle and Ted’s your aunty! I still have to do a little bit of finishing work on the protruding-wedged-through-tenons, but that essentially concludes this little project.

IMG_5542IMG_5543IMG_5544IMG_5545IMG_5546

I hope you enjoyed the series.

11/1/2016

At the beach house during the 2015 December holidays.

IMG_5776IMG_5777IMG_5778

Boorish Pencil Sharpener

7/9/2015

A few months ago I bought an electric pencil sharpener from Tools for Working Wood. Very excited with my new purchase I changed the plug (as we have different plugs in Namibia), inserted it into the power outlet and sharpened a pencil. Afterwards I saw some smoke emanating from the device, followed by a prompt discontinuation of function. On further inspection, I saw that this was a device made for 110 V power! Were the hell do you find 110 V in Namibia, I did not even know something like that exists!

I did, however, not allow my ignorance to get me down. This past weekend I found an old drill stashed away in a corner of the shop. It is in such a poor condition that it cannot be used as a drill anymore, but does still turn the chuck most of the time. For some unknown reason I thought of turning it into a pencil sharpener. Yes, I know it is probably a fire risk, can cause cancer (in California), might disturb the migration of several million mosquitoes during the next rainy season etc etc, but in Africa we do not fuss too much about stuff like that.

The result of my inventive activities is on display in the picture below. Unfortunately, it is probably the loudest tool in my increasingly hand tool orientated shop. One small downside of my ingenious invention is therefore that I need to use earmuffs when sharpening a pencil!

The BPS  works like a one armed bricklayer in Bagdad, but certainly would get some Greenies upset with the speed it churns through a forest. Please feel free to let me know how dumb (and/or politically incorrect) I am, or alternatively how I can find 110 V electricity in Africa, or how to turn the 110 V sharpener (what is left of it) into a 24O V consumer.

IMG_4988

Holdfast boots

18/5/2015

As self-proclaimed leader in the field of woodworking haute couture, I would like to introduce the next frontier in menuisier fashion. Last week the four Gramercy Tools holdfasts that I ordered arrived  after 5 weeks of traveling across time zones, an ocean and the equator. Holdfasts work like a charm, but tends to mar your work unless you stick a bit of scrap between it’s fangs and your stock. It can be a bit of a hassle so I thought of a way to address this particular issue.

I like to do leather work from time to time and it made sense to use this skill to alleviate the problem. As you can see in the pictures below, I custom-fitted these stunning Almond-toed leather booties to the business end of the holdfasts. I used two layers of Skeleton Coast seal skin for the sole and free range Namibian cow’s hide for the upper. It would not look out of place on a catwalk in Milan (says he), but I am not sure whether the common adage used to describe particularly sexy boots would necessarily apply. Apart from the obvious visual appeal, it has real functional advantages as well. It improves grip, protects your stock and cuts down the time spent fiddling with bits of scrap wood.

IMG_4444IMG_4445IMG_4447IMG_4446


I also took to the shaft section of the holdfasts with a rasps to improve it’s grip. It works like magic.

IMG_4450IMG_4451IMG_4448IMG_4449

Below you can find some examples of the boots in action. The pictures also provide ample evidence to support my decision to ignore Monsieur Schwarz’s Commandment to stick to very few dog/holdfast holes.

IMG_4452IMG_4453IMG_4454IMG_4455IMG_4518IMG_4524IMG_4528IMG_4540IMG_4535

Here are a few examples of a saw bench modeling the trend-setting footwear.

IMG_4456IMG_4457IMG_4458IMG_4487IMG_4488IMG_4491IMG_4492

My bench holdfasts live here.

IMG_4459


So there you have it, once again the best of tres chic woodworking. Only at Je ne sais quoi Woodworking.

The hovering skeleton chest

16/3/2015

You’ve heard of the Anarchist’s tool chest and the Dutch tool chest, which seems to be very much part of the prevailing woodworking vernacular. I would like to introduce the so called hovering skeleton chest. It is especially useful to woodworkers who decides to approach their bench from all sides, rather than the more popular custom of shoving it up against a wall. This is not a new idea as you can see from this close-up of plate 11 (AJ Roubo’s L’Art du Menuisier). Neither is the hovering skeleton chest (though possibly under a different name) a new idea, as a similar device is often employed in a kitchen to hang pots and pans from.

Plate 11_close

Here you can see the wife helping me to hang the contraption …

IMG_3471IMG_3472


… after which I stocked it with essential tools needed at the bench.


IMG_3473IMG_3475IMG_3474IMG_3482IMG_3484IMG_3496

Springbok and Seal leather sleeping bags

9/3/2015

In the pictures below you will see the collection of planes that reside on the shelve of my shop built workbench. There are quite a few shop made wooden planes, two Lie-Nielsen’s and the rest are all reconditioned old Stanley’s (nope, actually there is a Sargent too). In order to keep these planes from collecting too much debris, I am in the process of hand stitching comfy Springbok and Seal leather sleeping bags! Yes, I know this will probably mean that I (and my website) will be banned from any proper woodworking fraternity for the rest of my miserable life. On the upside I could become the Errol Arendz (South African reference) of woodworking couture. Yeah Baby!

IMG_3143IMG_3137IMG_3461

On the catwalk you may admire a beautiful shop made scrub plane dress in one of my exquisite creations. For some reason the phrase “je ne sais quoi” comes to mind.

IMG_3457

The silky Springbok leather keeps the plane from freezing to death in a shop that averages between 25 – 35°C (77 – 95 ºF). This is not called the Tropics for nothing. The virile Seal leather sole adds even more panache to the garment.

IMG_3458IMG_3459IMG_3460

Now wait for the eruption in the volatile world of du jour plane apparel …


Dog maker

9/2/2015

My nearly finished workbench needs a profusion of dogs. In order to speed up the production and have some degree of consistency, I made this dog maker out of a scrap piece of beech. It has a multitude of “high-tech features” such as:

IMG_3151

1) Self-tapping screw to hold the stock in position.

IMG_3152

2) A hole for drilling the bullet catch hardware hole.

IMG_3156IMG_3161


3) A kerf to saw a flat face (leaning 2º forward from the vertical position, ensuring that the upper most tip would touch stock first)

IMG_3153IMG_3162IMG_3163

4) A kerf to cut each dog to the exact same length.

IMG_3154IMG_3155

That is followed by a few more steps, once the dog is liberated from it’s maker. The pictures tells the story.

IMG_3157IMG_3159


IMG_3160IMG_3164


IMG_3165IMG_3166IMG_3176IMG_3227

Shop made beader

9/2/2015

… or at least that is what I think it should be called. I have been in the market for a beader for some time now. I found a nice pre-1900 Stanley no. 66 recently, but it is still hanging with Patrick Leach in the US of A. Patrick usually hangs on to my acquisitions until “critical mass is reached” (as he puts it) to justify a shipment.

This weekend I wanted to use beads to hide the fact that the two sliding deadmen I am currently working on are laminated. So I whipped this little guy together from some scrap Witels (Platylophus trifoliatus). I saw the design idea in a Fine Woodworking article (I think), a few years ago. It is armed with a Lie-Nielsen blade. According to LN, these blades will fit the Stanley no. 66. I will hopefully be able to report on that in the not too distant future.

As you can see, it did a sterling job.

IMG_3223IMG_3224IMG_3225IMG_3226IMG_3228IMG_3229IMG_3231