

24/4/2018
I am sure that every JNSQ reader must be bored mindless by now with this tedious series of posts. There is good news for the mentioned brethren though. This is the final nail in your metaphorical coffin.
Speaking of coffins, I almost led the way in ‘taking the ferry’ recently. As you might well know, we progressed to a fairly advanced stage in finishing the top. There were only 2 steps left i.e. laying down a couple of layers of varnish followed by some or other protective wax layer. A walk in the park you would think, hey.
Enter the first product bought in Namibia for this particular project. Yes, yes, I should have known better. Please do not judge me for my naïveté in expecting that something as basic as varnish and the snake oil merchants pushing it, can be trusted. Massive mistake non the less!! (and almost became my oneway ferry ticket).
Actually, one of these merchants really tried to be useful, but I guess it is simply beyond what is possible in the Third World. The so called experts recommended a particular type of varnish, that even the uber-expert in Cape Town (who were phoned for cutting edge advice) confirmed to be the bee’s knees on top of shellac. To cut a long story short, it was a kak recommendation.
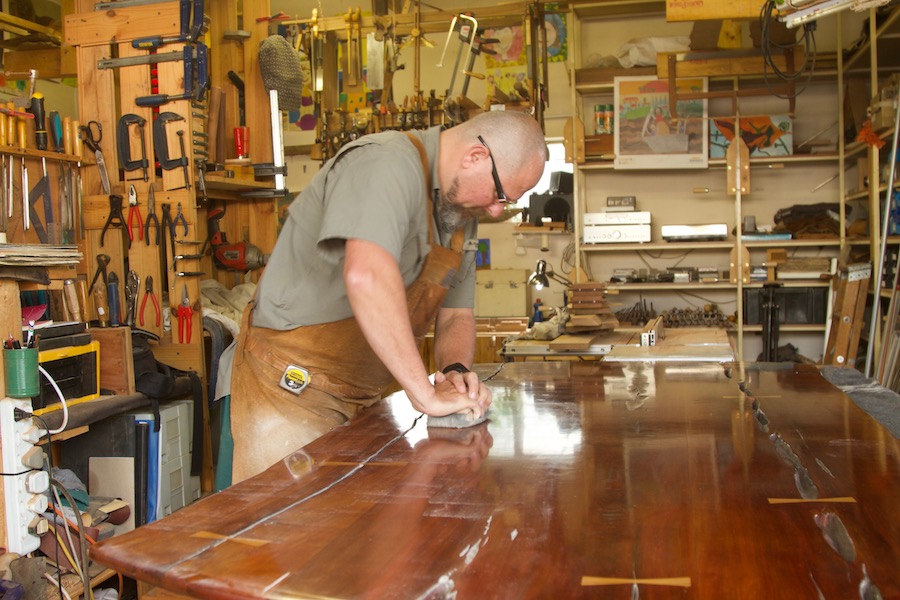
The picture below reminds of where we were before I indulged the fallacy that a local product will do as it claims.

This is a picture of the product in question. My guess is that it possibly arrived here several centuries prior to the dinosaur. It is probably a well matured (by now) amoeboid excrement of some description.

One coat of the amoeboid excrement and the top looked like this!! The patchy appearance is due to some of my early efforts to remove the scheiße.

The whole top looked like this after one coat. The varnish basically did not set, it simply formed a soft opaque layer. What to do …, what to do??
E-mail Don Williams. That is what you do. Being from a civilized part of the world though, he could not work out why this happened, but advise me to try and remove the layer with acetone. Thank you Don, you are a legend.

Another 4 hours of elbow grease and I got most of the stuff off. It necessitated some vigorous scrubbing with an acetone drenched piece of 0000 steel wool.

I then ( neologism warning!!) Mr. Miyagi’ed on another 5 coats of shellac and rubbed the surface down with 0000 steel wool afterwards.


I simply did not have enough balls (so to speak) to try another amoeboid excrement, so decided to rather apply a few layers of wax. Unfortunately, it was also a product I bought locally, but it seemed to work okay. The pictures below show the result.
PS – If anyone out there can point me towards a supplier that sell solid carnauba wax (and ship internationally) I would really appreciate it. I would rather make my own concoctions with the help of Don Williams’ recipes.


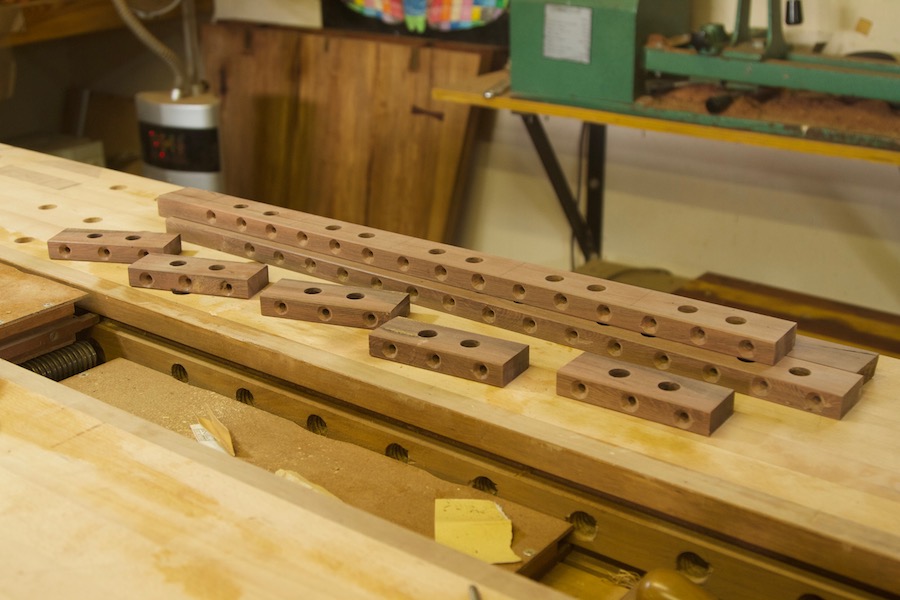
As I have mentioned some time ago, I wanted to use a novel system (to me anyway as I have not come across it) to attach the under carriage to the top. The objectives of my system are to allow for wood movement (surprise surprise) and to be easily adjustable in terms of avoiding natural defects such as cracks in the top. It is important to have such a system when working in the Nakashima style where aesthetically pleasing imperfections tend to always end up in locations where they are not particularly helpful from a joinery perspective. Seeing that 99% of the wood in my collection is of a Nakashimian (if you like) persuasion, I pretty much need a longterm solution. With this in mind I made ten pairs of the blocks pictured below.


I then found suitable strips of Assegaai (Curtisia dendata) to produce shop made dowels with my no. 77 Stanley dowel maker. Assegaai lends itself perfectly to this job given it’s characteristics of being fine grained, flexible, and stable. My son and I took turns to yank (yes that is yank not …) the lever while the other (individual) guided the blank. It is very difficult to do both these tasks at the same time in dense hardwood such as Assegaai.


Here you can see the first dowel, the Assegaai excrement (never thought I would get the opportunity to use the E-word so often in a single post) emanating from the dowel machine, and some of the pairs of Kershout blocks.

While all that was going on, the other major parts (of the table) received a few coats of shellac. I cannot tell you how much I enjoy working with shellac. It is absolute magic. I will never ever use anything else. Especially not commercial junk (thought of throwing the E-word in there but you might be getting tired of it by now) made by big companies.


The next step was to drill the holes for the dowels in the aprons.


One of my all time favourite tool companies is L. & I.J. White Co (Buffalo, N.Y.), even though I do not own a single tool with that name on it. I do however have an electronic version of their 1909 catalogue (and an imagination) and that is enough (for now). It helps having an imagination (and a tool catalogue) when you do not have certain things you would like to have. You learn this particular skill on the wrong side of town while growing up.
Anyway when I though of what to put on the copper plate in order to identify the artisan who made the table and date it, I came up with “G. & J.G. Marx 2016-2018”. It is the initials of my late father and I. The dates (I realised too late) should have read 2015-2018, but that is not a major drama. Even though my father never worked on this table, I would never have been able to produce anything close to this if it was not for what he taught me.


I prepared the lion’s share of the joinery of this table during the driest season on the ambient humidity calendar and took great care to ensure that the joints fit quite snug. The reason being that all of the cardinal joints will not be glued. Sort of in the Japanese tradition, I guess. Only problem is, on the 20th of April when the undercarriage were to be assembled it was not the driest time of year.
In fact the ambient humidity was sitting at around 50% for two weeks prior to assembly, whereas the joinery was done at around 20%. What to do …, what to do …. It was not an option to refit the joinery as that would lead to a sloppy fit during the dry season, so I applied wax to the mating surfaces of the joints and reached for the heavy dead blow mallet. I have to admit that it caused one hell of a lot of anxiety.
Imagine pounding away at parts of a project that took you 3 years to complete and as luck would have it, the bridal joints at the top of the Windsor leg resisted matrimonial union the most. Beating the proverbial snot out of the joints with a 1kg shop made dead blow mallet on top of those delicate Kershout spindles felt like sparring with Liv Tyler. Actually, I might be more partial to the latter, but that might represent an unfortunate deviation from the topic at hand. What I realized though, was that those spindles acting in unison are tremendously robust. After all the violence the undercarriage was assembled without any major disasters. I had no intention of dismantling it (which was the original plan) for the move to it’s new home the next day, even if that meant that the new owners had to demolish half their house to get it in there.
This reminds me of Koos Kombuis who once said “After the riot, peace and quiet!” as a Southern African take on the the well known fag (as in cigarette) slogan “After action, satisfaction”.
The tool models in the pictures below are (in no specific order) the trusty Nafta and (the ever-so-slightly-less trusty) Aoife.


The use of a single screw to secure each bridal joint for centuries to come, probably fall into the overkill department, but I cannot help myself.

By the way you can also appreciate the Peter Galbertian wedges at the top of the spindles in the picture below.


The gaps in the bridal joint you can see here, allow for wood movement.

I listened to ‘Roadie’ as performed by my favourite Kiwi band ‘Fat Freddy’s Drop’ while attaching the undercarriage to the top. I never knew what the word ‘Roadie’ meant so though I should have a look while writing this post. Turns out it was quite an apt anthem for this particular task/project.


Speaking of ‘trusty’ and ‘overkill’, here you can appreciate an activity that would represent an overkill with a tool that can be described as trusty. Cutting the dowels with a Langdon Mitre Box with a makeshift stop to ensure uniformity in length, could possibly represent the early stages of losing one’s mind, but at least it implies some form of insight on behave of the sufferer.


I hope the pictures below will do an efficient job of explaining how my system of attaching the undercarriage to the top allows for wood movement and provides flexibility in term of avoiding imperfections in the top. In the first example we do not need to avoid anything so this is the standard setup. Both the dowels and the holes through the apron are ½” in diameter. The holes in the block that fit over the dowels are around the 9/16″ mark, which should ensure friction free movement.


I used spacers to ensure consistent and parallel gaps between the blocks and the apron while marking out the exact location of the pilot holes for the screws.

Here we have the standard setup.

The example below illustrates how this system allows some flexibility in positioning of the blocks. As you can see, the dowels were cut slightly longer to reach across the Fish River Canyon (so to speak) to ensure that the screw through the block hits solid wood on the far side.


In order to hold the top down as close to the edge as the design of the undercarriage would allow, I came up with the this idea. The block of wood to the right of the protruding dowel slides over it and gets locked down with two screws.

The transport to the table’s new home went surprisingly smooth. Once there I reattached the top and Bob’s your Uncle. The new owner did enquire why I had such a pronounced tremor on me and despite drinking far too much over many years it was most definitely predominantly due to the anxiety associated with ensuring that this labour of love reach it’s destination safely.


I hope you will allow me the excessive number of photos that follow.


Christy and Connor having dinner on top of the new member of the family.

Finally, all that is left to say is, thank you Jan Gerhardus Marx. Thank you.

That came out beautifully. It really fits the space that it lives in now.
You can be the poster child for testing finish on a piece of scrap now. You can’t get finishes easily but you have ready access to exotic African wood. It’s cheaper to ship varnish than timber, so you aren’t too inconvenienced.
Q: How many psychiatrists does it take to remove the finish on a tabletop?
A: One, but the finish has to be willing to change.
Sorry, couldn’t resist.
Steve
Hi Steve
I loved your Q & A joke, had a good laugh mate.
I really do need to adapt this ‘new’ strategy to first do tests on scrap
I agree, it can be worse than living here.
Thank you for the compliments and please stay in touch.
All the best brother.
Gerhard
Beautiful looking table.
Dictum in Germany sells Carnauba wax (and other waxes too). They ship internationally, and the service and the products are outstanding.
Apparently Namibia isn’t the cheapest place to get something mailed to, so as far as I could tell, sending a package of 1 kg will set you back some 36 Euro.
But it is better than messing up a table top using some dubious local materials.
Brgds
Jonas
Hi Jonas
Thank you for you comments and advice. I will most definitely follow up on Dictum. That sounds like a good idea.
Please stay in touch.
Gerhard