
9/3/2017
This post disappeared from my site while it went into hiding. Here it is again for those of you who missed it.
Welcome back to JNSQ woodworking. Here is hoping that we will continue to share woodworking banter and ideas in 2017. This past weekend was my first back in the shop and it was a real joy. Much like 2016, my two main projects to focus on will be this so called “second commission” and the table for the shebeen.
7/11/2016
I will now report on the work done since our previous update in October of 2016. As usual just a quick reminder of what we are aiming for. A few shots of the model I built while developing the design.


Something that I omitted to illustrate in the previous post is the techniques that were employed to ensure that the spindles end up with zero splay. The first method makes use of a device that we shall call the Tambotie gauge (as I used a small Tambotie off-cut to create this fantastic piece of equipment).

While reaming the mortises for the spindles you might remember how I made use of a stick with an appropriately sized tenon to check the rake angle.


The Tambotie gauge is used to check that there is zero splay by comparing the gap between the Tambotie off-cut and the spindle on both sides, as referenced off the side of the beam with the square. In this case the spindle is leaning ever so slightly towards the right.


Second of the two strategies again involves a highly complex jig that takes hours to build and set up. I clamped a winding stick to the side of the beam to check wether the spindle (positioned in it’s mortise) runs parallel to it, i.e. zero splay.


Once all eight mortises received this treatment it was time to test how the assembly would fit together. As you can see it came together nicely.


It is probably important to report on the stuff-up I made while drilling the pilot holes for the mentioned mortises. You might remember that I drilled one of these holes in the wrong direction and suffered from a Panic Attack subsequently. The solution I came up with was to turn a dowel of the same wood that fitted the hole perfectly and glued it into place. The hole was then drilled in the correct direction and the picture below show the result. There was only a small strip of the plug visible after drilling the new hole.

After reaming out the mortise there was no evidence left of the blunder on the surface that would be exposed to critical eyes once the tenon gets glued into position. In the pictures below you can however see the edge of the plug inside the hole. Eish, that was a close call. Woodwork has a way of keeping you grounded, isn’t it.


As these tenons run all the way through the beams, I decided to also wedge them. Here I am widening the mortise on the exit side to accommodate the wedges. I recommend reading Peter Galbert’s seminal work “Chairmaker’s Notebook” on how to orientate these spindles and wedges.


Next up I had to camouflage the laminations with a few carefully placed beads before glueing up the leg.


I used my pre-1900 no. 66 Stanley beadingtool, which I restored quite some time ago. It takes elbow grease beading such incredibly hard wood, but it is very satisfying nonetheless.


I think it accomplished what I intended as the beam now looks like a solid piece of timber.

The tenons were then prepared to receive the wedges.

Made some wedges …


… and prepared for glue-up.

I used a combination of mallet blows and clamps to coax the spindles into position.


Once they were seated to my liking the wedges locked them down for ever (I hope).


This is how the Windsor leg spent it’s December holidays, resting on the assembly table.

16/1/2017
This past weekend I continued my assault on the so called Windsor leg. I clamped it to the trapezoid leg and used the latter to mark out the final shape of the former. This way they are exact copies of each other in terms of measurements.


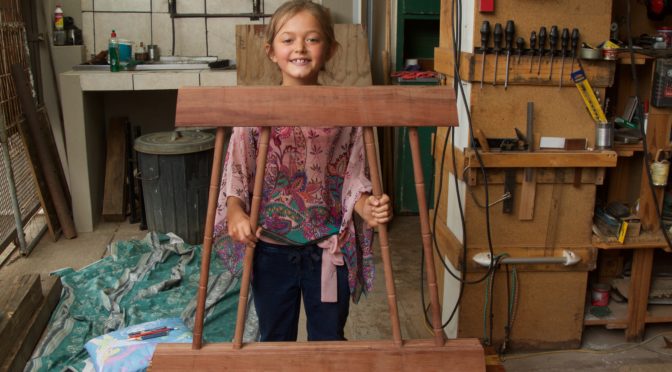
My daughter Aoife helped me to make the necessary cuts using my Miller’s Falls Langdon Mitre Box no. 75. It was quite a tricky operation given the awkward shape and size of the leg , but the Langdon made cutting the 9º angles straight forward.


One day the student will become the master.

The next big drama will be the third layer of wood that needs to be added to the trapezoid leg. I selected a good Witpeer (Apodytes dimidiata) board that ran pretty much through the centre of the tree and made a cut lengthwise along the pith. This gave me two quarter-sawn pieces. From these boards I then selected appropriate 800 mm chunks for re-sawing. The idea with re-sawing is to created a book-matched pattern to the inside of this leg. This layer only needs to be about 8 mm thick to get the total thickness of the leg up to 44 mm, which fits perfectly into my ratio of 22:44:66:88 mm (thickness) for the various parts of the table.


You will notice the two strips of Kershout (Pterocelastrus tricuspidatus) on top of one of the piles of re-sawn and planed stock. We will use those to create a type of depth confusion for an observer viewing the table from the Windsor leg’s end. This will hopefully enhance the effect of an construction that defies gravity, but you (and unfortunately I) will have to wait until the next post to see how this works or possibly not?? Here’s hoping (that it works, that is)!


Glad you salvaged this post…
Good to see the tool model has fully recovered.
Oh, and good job 🙂
Bob and Rudy
Hi Bob
It is wonderful to hear from you mate. Aoife is not completely back to full recovery yet, but making progress all the time.
Regards to Rudy
Gerhard
Gerhard,
Glad to the the project is progressing well. Looking forward to the next installment.
Jonathan
Thank you Jonathan, the next post’s photos is ready. It only needs the text to go with it. Preparing the photos to be web friendly is a lot more of a mission than I thought, but at least I have now learnt a new trick.
Enjoy your upcoming trip brother.
Gerhard