
31/3/2016
Part one in this thrilling series can be found here.
The rabbet/rebate where the slats will be fastened to the long rails were cut on the table saw and cleaned up using my no. 78 Stanley rabbet plane. As you can probably deduct, I found this particular plane in a dilapidated state without a lever cap and lots of surface rust. It therefore received a complete rehab, which included the challenge of producing a custom lever cap fashioned out of brass (ala Lie-Nielsen) and a idiosyncratic lever cap screw. You can read the whole story here.


Bed parts resting to fight another day.

The future owner helped me to assemble the bed for the first time and it fitted together like a charm, first up.


She clearly did not realise that we need to add a few more essential parts.

Checking whether I have enough slats, before processing them further. As I mentioned before, this is Tasmanian Blackwood (born and raised in Africa) that was reclaimed from crates my father built several years ago to transport all his tools to me. Therefore it is clearly not the pristine stuff you would use for other parts, but will be doing the dirty work while hiding under a mattress anyway.


I pulled out my shop made Jack plane (with it’s blade bedded at 50º) to square the slat stock up. The 50º bedding angle made planing the TB much easier as it tends to have schizophrenogenic grain direction.


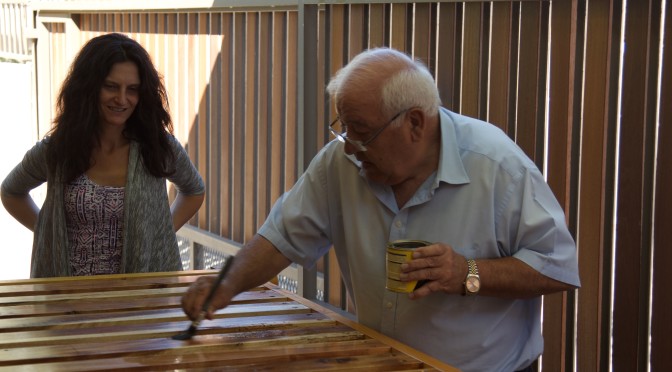
The Scots pine received a treatment of turps mixed with tung oil, followed by two coats of shellac, followed by three coats of Woodoc 5. The photos below were taken at some stage during the finishing process.


Didi and Aoife helped to rub the surfaces down with 0000 steel wool between each coat.


12/4/2016
I bought a 1969 MGB in Cape Town during the Easter weekend. It necessitated my father to help drive the other vehicle back to Windhoek as my wife ran the 56 km Two Oceans Ultra-marathon the day before we headed back. That pretty much took her out of the equation as a driver. We completed the 1600 km drive over two days as I did not want to push this grand old Lady too hard.

Anyway, that meant that my father who got me interested in woodworking in the first place, had his first visit to my shop. Quite a few of the tools I am still using on a weekly basis used to serve him over many years in his shop. It was a wonderful privilege to work with him in my shop and show him what I have been up to over the past few years.


Here we are drilling the pilot holes for the screws to fasten the slats into position in the rabbet mentioned earlier. We decided to drill the pilot holes at approximately 60º to ensure that the screws would pull the slat into the corner of the rabbet, while at the same time holding it down. I am not sure whether that is explained well, but it is the best I can do with my English.


Wax on, wax off. One day the student becomes the master.


Ready to screw the slats into place. If you have 12 slats you need 11 gaps between them. Therefore one way to work out what the size of the gap should be is to slide the slats to one side and divide the remaining space into 11 using your dividers. Once you know the size of the gap it is easy to cut two scrap blocks of wood to that measurement to use as spacers while screwing the slats into place.


In the picture below you can see the two custom made spacers in action. I am working from left to right in the picture. The toolset for this particular job included a Millers Falls no. 2 hand drill (ca1938), Stanley Yankee no. 131 spiral ratchet screwdriver, some oil to lubricate the classic type wood screws, and the screws of course.

One more coat of Woodoc by the Master himself and Bob Demers’ your Uncle.


We will look at he process of making the headboard in the next instalment. Just to tickle your fancy, this is the piece of timber I chose for the headboard. It is a piece of Without (aka Cape Holly or Ilex mitis). The Afrikaans name is spelt the same as the English word without (obviously), but actually means white (wit) wood (hout).
