Category Archives: Shop made tools

The Marking All-rounder

14/7/2014

I have a few of these Marples & sons cast steel centre bits that lost it’s centre pin (for the lack of a better term) somewhere between the late 1800’s and the present day. You might remember a post where I fashioned a so called Brace Bit Birdcage Awl from one of these bits some months ago. In the photos below you will see a centre bit that is still completely functional and one that I converted into a marking all-rounder. By this I mean a tool that is compact (can be carried around in my custom made leather shop apron) and functions as a marking knife as well as a birdcage awl. If you click on the pictures they will open up in a larger format, which should help to explain how the shape of the cutting end would accomplish the all-rounder status. I wrapped some leather around the shank for a comfortable grip.

IMG_1896IMG_1897IMG_1898IMG_1899IMG_1900IMG_1901


Shop made Melencolia square with the Marxian Improvement

14/7/2014

I first learnt about these squares from Chris Schwarz’s blog on the Lost Art Press website. He was made aware of these by Jeff Burks who noticed it in an Albrecht Dürer engraving dated 1514 (see picture below), and several other ancient woodwork engravings. It has obviously disappeared from the modern woodworking toolset, but seems very useful as a light small square that would be easier to hang on one’s apron than the modern versions.

300px-Melencolia_I_(Durero)melancholia_i_detail

Chris made some of these himself and also recently blogged on those made by Niel Cronk (pictured below). I used the ancient engravings (posted on the Lost Art Press site), Chris and Neil’s versions as a starting point for mine.

cs_melencolia_open_img_8725cronk_square1_img_9908

The first picture show how Chris used a two piece design for his handles and Neil (second picture) used a single piece. I decided to use a single piece.

cs_melencolia_stocks_img_9446cronk_square_detail_img_9911

As for the blade, I decided to use Chris’ design with a slight protrusion of the blade beyond the handle to make it easier to square the tool up post gluing and in future. He calls it the Romanian improvement as the idea comes from decorations on the pews of a Romanian fortified church in Biertan (second and third pictures). The church were constructed between 1468 and somewhere in the 16th century.

romania_square3_img_9498romanian_square1romanian_detail

14/7/2014

I found some bits of beech (for the blades) that fell off while building all those hand planes last year and a small piece of Olienhout (for the handles). I first glued an Ysterhout strip to the edge of the beech blades to make sure that the so called business end would last forever.

IMG_1668

Cutting this groove in the Olienhout handle was actually the first job I did with my Lie-Nielsen tongue and groove plane.

IMG_1720IMG_1721IMG_1722IMG_1723


In the first picture you can see the ysterhout strips on the blade stock. The second picture show how the blades were glued to the handles.

IMG_1732IMG_1733


As usual, I like to add my own twist to the design. I therefore changed the design of the handle to improve the grip for the various different ways the tool will be used. I think it also adds a bit of esthetic je ne sais quoi as well. We could call it the Marxian Improvement!

IMG_1735IMG_1736IMG_1737


I tried to illustrate how I think the design helps with grip by taking a few pictures of my own hand.

IMG_1738IMG_1739IMG_1740IMG_1741IMG_1742


Shop made winding sticks

30/6/2014

A post on an interesting winding stick design on the Lost Art Press website, got me as far as to finally build a proper set. It has been on my list of things to do for quite some time, but given that my major project for 2014 is a 18th century workbench, there are a host of shop made tools waiting patiently to be designed and made. The first picture below shows the design that Chris Schwarz discussed in his blog last week. I liked the idea of the holes that helps to see the high corners when using the sticks looking into a light source. I have found that it becomes a bit of a challenge to see the far stick while looking towards a light source. I used a combination of the designs in the pictures below, which I found on the net.

winding1_img_965412312_winding112312_winding2


I used beech and Kershout for contrast purposes. This piece of Kershout is incredibly hard to the point were I had a hard time to plane it, even with very sharp irons. I made two beech dowels which were glued and tapped through the centre of both sticks (pictured) to make it easier to located the sticks in the middle of the board being checked for wind.

IMG_1415IMG_1416IMG_1417

Here I chiseled out small triangular areas to be filled with epoxy mixed with black acrylic paint. The idea is for the two triangles to make it easy to line up your sight down the centre of the sticks while using it.

IMG_1424IMG_1425IMG_1426IMG_1427

I used the setup below to mark out the shape of the sticks on the end grain to provide me with a guide while shaping it by means of the table saw, hand planes and sanding planes.

IMG_1434IMG_1435IMG_1436

Sticks after a confrontation involving my table saw.

IMG_1437IMG_1439

The various gadgetry I have made over the years that attach to my assembly table amde it fairly easy to shape the sticks using a #5 Bailey Jack plane and a Nie-Nielsen small block plane (based on the Stanley #102).

IMG_1444IMG_1445IMG_1446IMG_1448IMG_1447IMG_1449IMG_1450IMG_1453

Here I used the mentioned concoction to inlay the small triangles.

IMG_1454IMG_1455IMG_1456IMG_1457

The final surface preparation were done with shop made sanding planes and sandpaper on glass.

IMG_1465IMG_1466IMG_1467


A few coats of Tung oil followed by Wooddock and we have a set of je ne sais quoi-esque winding sticks. In the final picture you can see it hibernating in a custom made (by moi) leather sleeping bag.

IMG_1493IMG_1494IMG_1495IMG_1461


Upholstery needle awl

29/5/2014

Recently my wife and I decided to re-upholster a couch I restored some 15 years ago. We decided to use leather. While thinking through the tools and steps needed I realised that I do not have a monster needle to do the buttons. I found an old file handle and a piece of steel that did duty as a guide for a router’s fence in a previous life. I drilled a small hole about 30 mm from one end, countersunk it on both sides and sharpened that end. For the purpose of the couch we used this crude tool with a plastic handle.

IMG_1126IMG_1127IMG_1128IMG_1129IMG_1130IMG_1150IMG_1151

Once the couch was finished I drilled another hole in the part of the shaft that will end up inside the handle and tapped a small nail through it. Epoxy was used to fix it within the old file handle.

IMG_1167IMG_1168IMG_1169IMG_1170IMG_1171IMG_1172


IMG_1173IMG_1174IMG_1175IMG_1194IMG_1195IMG_1196IMG_1197

Winter wooden hand planes

16/6/2014

In 2013 I built a comprehensive (or it felt like that at least) set of wooden planes during the winter. They worked wonderfully well until the humidity shot up during the rainy season. This was not a surprise as I planned to only use them during the dry season, which is most of the year anyway here in Windhoek. I knew about this tendency of the wooden planes to go out of flat with the change in seasons from all the reading I did before embarking on the building phase. One author recommended that one should actually build a winter set and a summer set, then you never have to re-flatten them.

We had a fairly wet rainy season this year and the humidity in my shop continued to fluctuate between 50-75% until mid May. I kept checking my wooden planes to see when they would return to their flat state. One week ago I started thinking that they might never return to this state without encouragement. I started developing theories on why that might be, ranging from poor workmanship to wrong grain orientation to flaws of the laminated construction/design and many more.

Finally one evening last week I decided to coerce them back into working order using 3M adhesive backed sandpaper on glass. To my surprise when I checked the soles on the flat glass prior to the planned coercion, they were spot on back to flat. It thus took about a month from the time the ambient humidity got back to around 30% (which was the humidity at which they were built and flattened) for them to return to their flat state. While I was at it I decided to do a light sanding anyway.

IMG_1184IMG_1185IMG_1187IMG_1188

All the planes were exactly the same, but these pictures of the jointer illustrates it best. In the pictures below you can see how the sole looked like after a few light passes over the sandpaper. The toe, the area around the mouth and the heel were all in the same plane. That is exactly what you want for a well functioning plane. I continued to sand it all into the same plane, but it only took a few more very light passes. I can therefore confirm that these planes return to their flat state once back at the ambient humidity it was last flattened at. In this case it took about 4 weeks.

IMG_1189IMG_1190IMG_1191IMG_1193

Makeshift Panel Gauge

10/6/2014

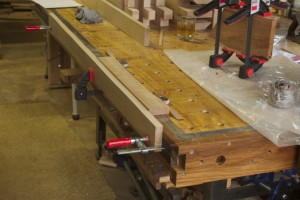
‘Makeshift’, in this particular case, means I ‘made’ it myself and the fence can ‘shift’ to the appropriate position needed. Of course it also alludes to the fact that the original idea was to fashion a ‘proper’ makeshift (as in temporary substitute)  panel gauge as I needed one for the next phase of hand planing the twin-top of the 18th century workbench I am in the process of building (to the correct width) and did not want to waste too much time in building it. The problem is, as soon as I start thinking about an easy way to produce a makeshift tool, my obsessive compulsive urge to overdo it, kicks in. In the end, it becomes a major mission to design the best looking je ne sais quoi-esque panel gauge the world has ever seen. I rarely (if ever) succeed in this quest, but it does not stop me trying, as it usually turns out to be an enjoyable challenge.

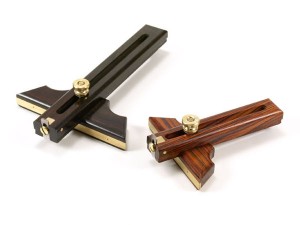
In the end I consulted the file where I saved quite a few pictures of different panel gauge designs and articles on how to build one. I ended up picking the design seen in the picture below as a starting point. I found the picture on the internet ages ago and unfortunately did not make any notes on the company or person who designed and made them.

OLYMPUS DIGITAL CAMERA


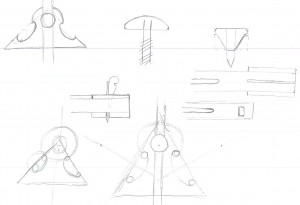
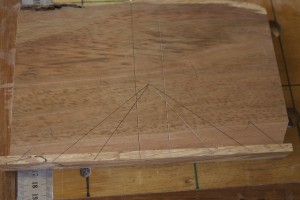
With this mechanism in mind I started playing around with a few ideas (freehand) on paper as you can see below. The shape I felt could work (if explored a bit more) was the one in the top left hand corner.

Panel gauge design 1

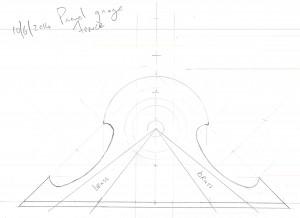
That night I sat down with a few drawing aids and explored the options thoroughly by using quite a few of the new skills I learned from the brilliant Lost Art Press book entitled By hand & eye (George R. Walker & Jim Tolpin). I finally settled on the shape below.

Panel gauge design 2


16/6/2014

On Friday afternoon I managed to find a Piece of Kaapse Swarthout (main body of the fence) and 5mm (thick) strip of Ysterhout (for the surface that slides against the work piece). I also combined these two for the adjustment knob. These parts were glued up over night.

IMG_1198IMG_1199IMG_1200IMG_1201IMG_1202IMG_1203IMG_1204IMG_1205

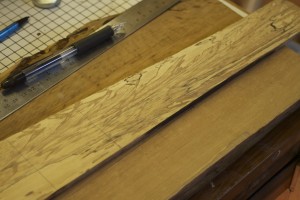
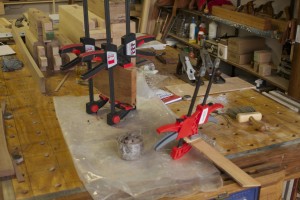
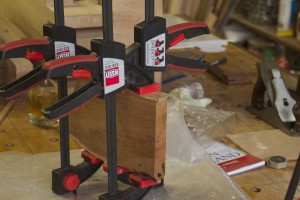
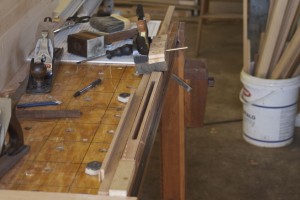
Next I found a nice straight grained piece of Assegaai for the stem. Some fiddling with a couple of off-cut wedges provided a safe way to fix the small piece to the assembly table before cutting the groove with the router.

IMG_1206IMG_1207IMG_1208IMG_1209IMG_1210

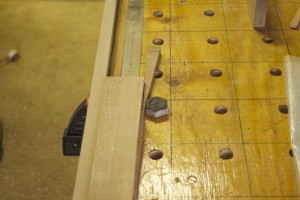
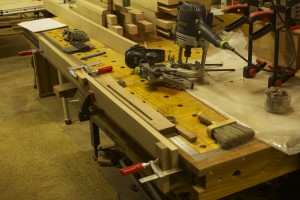
It was then sized on the table saw, hand planed to near perfection and fed to the table saw again to cut the bulk two small rabbits. The rabbits were finished off (3 mm x 3 mm) by hand using the my rehabilitated #78 rabbit plane.

IMG_1211IMG_1212IMG_1213IMG_1214IMG_1215IMG_1216IMG_1217

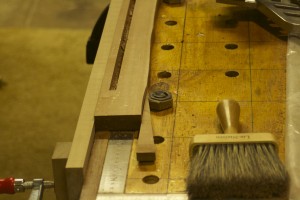
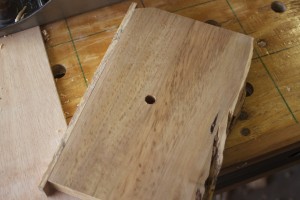
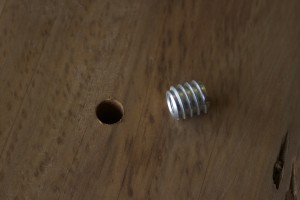
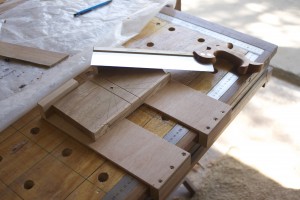
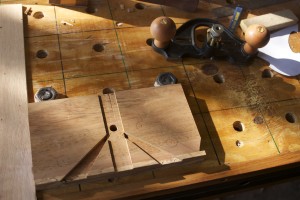
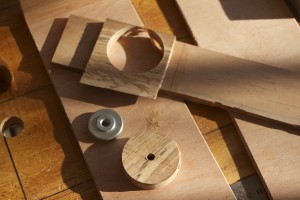
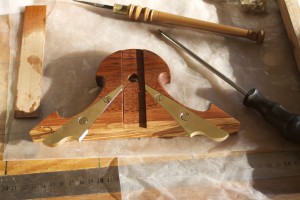
On Saturday morning I started on the fence. First task was to drill the hole for the insert nut.

IMG_1223IMG_1224IMG_1225IMG_1226

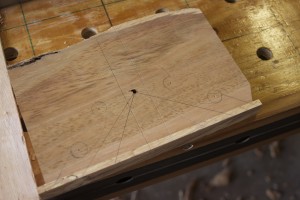
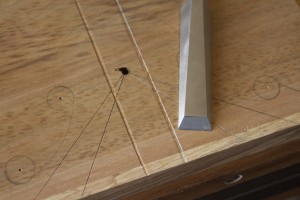
The shallow dado (3mm deep) that is meant to accept the stem was cut first. I used Robert Wearings trick to first created a groove using your chisel and using that to guide your saw for precision work. After using my carcass saw to cut the sides, I proceeded to remove the waste using a router plane. Once the dado was done it made it possible to saw the sides of the areas meant to accept the brass guides. Again the router plane and a chisel made short work of it.

IMG_1227IMG_1228IMG_1229IMG_1230IMG_1232IMG_1233IMG_1234IMG_1235

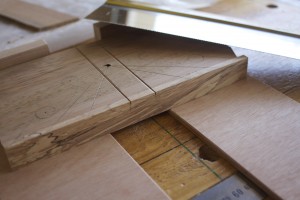
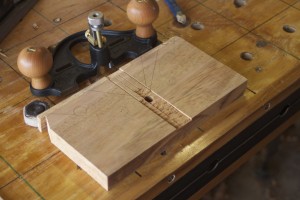
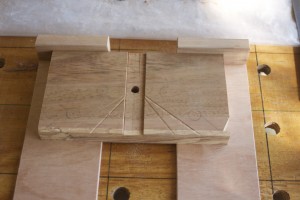
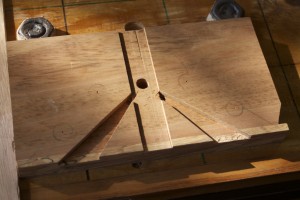
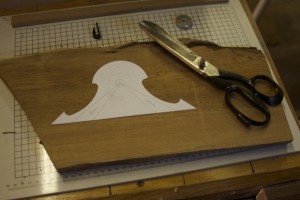
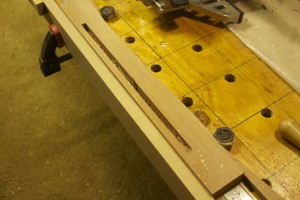
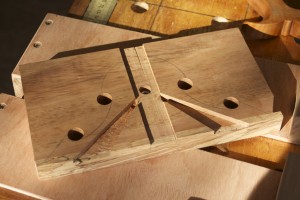
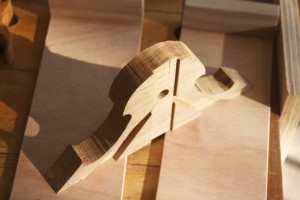
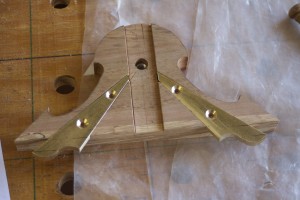
In order to liberated the actual fence from its mother, so to speak, I drilled out the areas pictured and cut the rest with the band saw.

IMG_1236IMG_1237IMG_1238IMG_1239

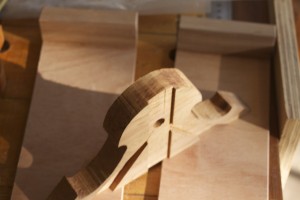
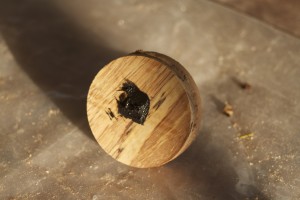
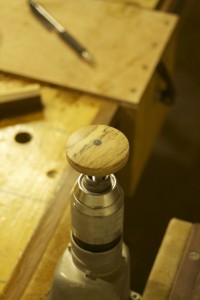
The knob received the following treatment. I used epoxy as adhesive and added black acrylic paint to it for the infill work.

IMG_1240IMG_1241IMG_1242

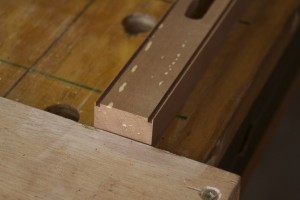
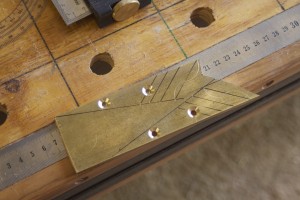
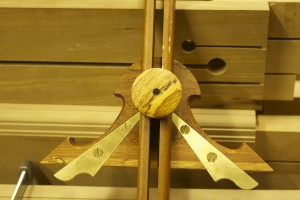
On Sunday I started shaping the brass guides.

IMG_1334IMG_1335IMG_1336IMG_1337IMG_1338IMG_1339IMG_1340IMG_1341

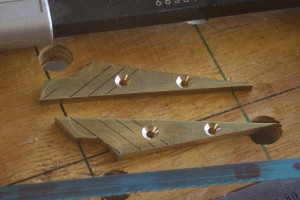
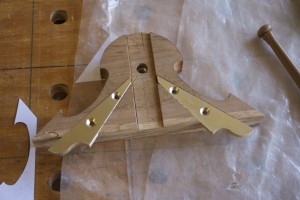
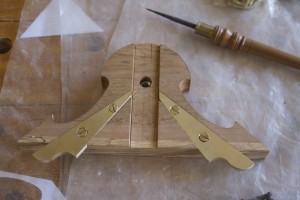
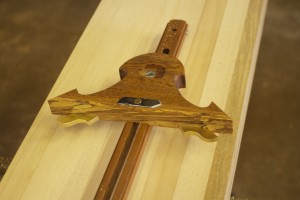
Then back to the fence for some file TLC, followed by fixing the guides into position and a coat of tung oil.

IMG_1342IMG_1343IMG_1344IMG_1345IMG_1346IMG_1347IMG_1348IMG_1349

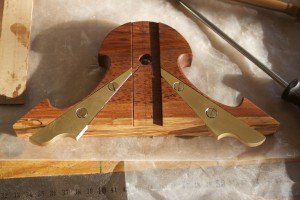
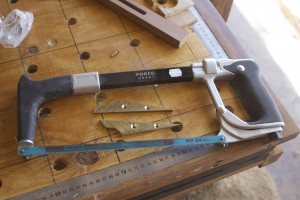
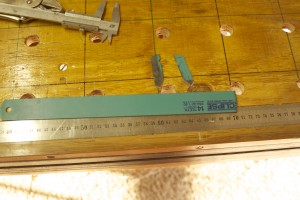
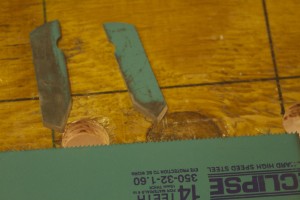
I fashioned the blades out of a piece of this heavy hack saw blade. It is surprisingly hard steel and about 2 mm thick. As you can see I shaped the cutting edge with two different angles and put the bevel on opposite sides, which means that between the two blades I have 4 different cutting options depending on which blade is selected and how it is mounted.

IMG_1350IMG_1351

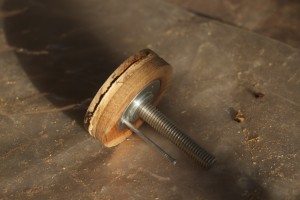
It is the first time that I thought of using this technique to tidy up and shape a knob. It worked like a charm.

IMG_1352IMG_1353

Here I added two thin Ysterhout spacers to align the bottom of the tem perfectly with the bottom of the brass guides. The ysterhout is also extremely resistant against wear. The wedge that keeps the blade in position is made of Tamboti.

IMG_1355IMG_1356

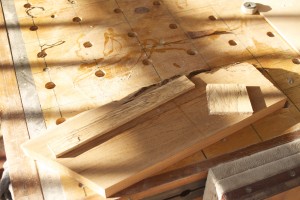
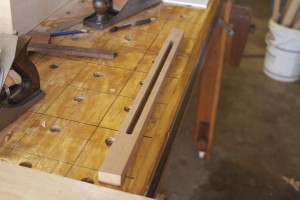
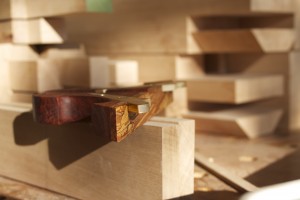
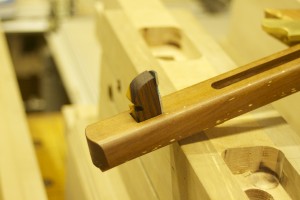
Last night I quickly did the final shaping of the stem …


IMG_1357IMG_1358IMG_1359


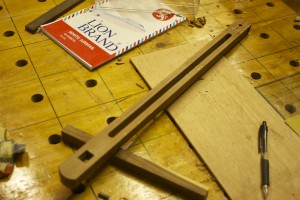
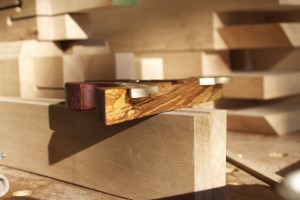
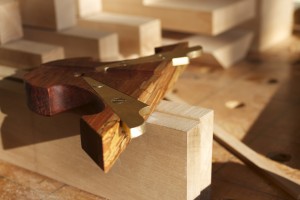
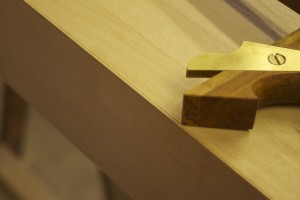
… and Bob’s your Uncle, Ted’s your Auntie … one ‘makeshift’ panel gauge with je ne sais quoi!


IMG_1360IMG_1361IMG_1362IMG_1363IMG_1364


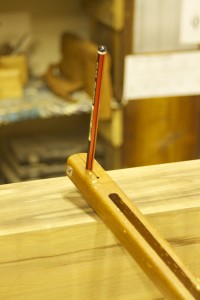
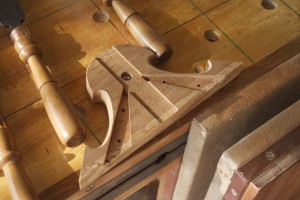
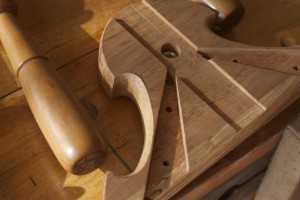
I decided to fix the spare blade to the back of the gauge and it ended up having a nifty function to act as a hook to keep the gauge from falling from it’s new little home on my tool rack.


IMG_1381IMG_1382IMG_1410IMG_1408IMG_1409


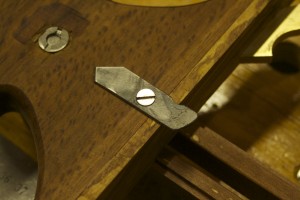
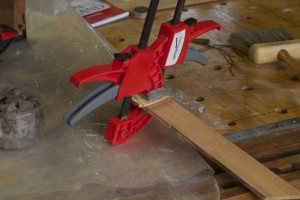
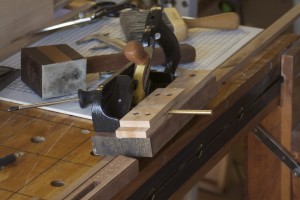
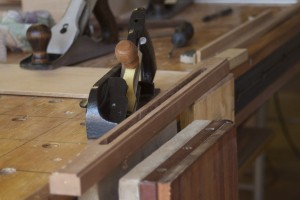
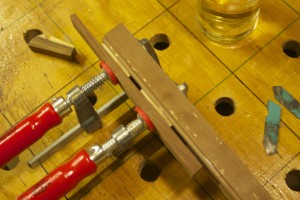
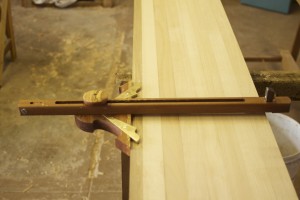
Panel gauge in action.


IMG_1378IMG_1377IMG_1380IMG_1391IMG_1392IMG_1411

Didi’s Projects

3/2013

My son Didi (short for Didier) is slowly starting to develop an interest in what is going on in the shop. I thought I should start documenting his progress. Here you can see him building a wild bird feeder.

IMG_5571IMG_5572IMG_5575IMG_5577IMG_5579IMG_5580IMG_5582IMG_5583IMG_5585IMG_5593IMG_5595

31/3/2014

He did the bulk of the work to glue-up and turn his first tool in the form of this beautiful Witpeer mallet.

IMG_0069IMG_0070IMG_0071IMG_0072


IMG_0418IMG_0419IMG_0420IMG_0421IMG_0422IMG_0423IMG_0425

IMG_0427IMG_0428IMG_0429


Project inventory 2012

The major project of 2012 was the assembly table I built, which was also intended to act as a makeshift workbench until I manage to gather a bit more information and skills to build a dedicated one.

http://www.jenesaisquoiwoodworking.com/alternative-workbenchassembly-table-chapter-one/

http://www.jenesaisquoiwoodworking.com/alternative-workbenchassembly-table-chapter-two/

http://www.jenesaisquoiwoodworking.com/alternative-workbenchassembly-table-chapter-three/

http://www.jenesaisquoiwoodworking.com/alternative-workbenchassembly-table-chapter-four/

http://www.jenesaisquoiwoodworking.com/alternative-workbenchassembly-table-chapter-five/

100_0293100_0285100_0271100_0258

I invented and made these benchdogs which works like a charm. I include a photo of how I used it this past weekend while working diagonally across a heavy beam of Witpeer with my shop made scrub plane. They are known in my shop as Bench Bitches.

http://www.jenesaisquoiwoodworking.com/bench-bitches/

100_0295100_0277IMG_0160

One Effulgent Arm.

http://www.jenesaisquoiwoodworking.com/extremely-efficient-effulgent-arm-eeea/

100_0573100_0523

Saw Hook

100_1129100_1130100_1131100_1133

Chopping board for the beach house

100_0582100_0583IMG_3235

Sushi plates

100_0584

Knife rack for the beach house

100_0882100_0883

Sun oven for the beach house

IMG_4031IMG_4032IMG_4033


Dowel plate

100_0558


Spice rack for the beach house

100_0933100_0940


Brace Bit Birdcage Awl (also known as BBBA)

7/4/2014

Once again on Saturday morning I curtailed my current bench building activities briefly in order to produce a so called Birdcage Awl. I found an old Marples & Sons brace bit that had most of it’s business end missing in action. The square tang of the bit that fits in the brace made me think that it could masquerade successfully as a Birdcage Awl without too much fuss. The steel is obviously top notch as the bit is probably more than a hundred years old.

IMG_0112

The bit comes from my father’s collection. I tried to take a photo showing the Marples & sons stamp, but I probably need a macro lens for that. The small block of Witpeer was left over from another project and had the ideal dimensions for me to turn the handle from.

IMG_0113IMG_0115IMG_0114

… as so.

IMG_0116IMG_0117IMG_0118


I first did the bulk of the shaping with the bench grinder and then run through 80, 100, 120, 180, 240, 360, 400, 600 and finally 1200 grit wet-and-dry sandpaper on glass.

IMG_0119IMG_0120IMG_0121IMG_0122IMG_0123


The handle received a copper ferrule …

IMG_0124IMG_0125IMG_0126

… before I drilled a tapering hole with several different diameter drill bits to accept the shank of the brace bit. It was only tapped home (much like the way one would seat a rasp), as one would need to be able to remove the bit for future sharpening.

IMG_0127IMG_0128IMG_0129IMG_0131IMG_0130IMG_0132

Finally, it received the usual treatment with successive layers of Tung oil/Ballistol and Wooddock. This is an excellent awl for making holes to accept wood screws in softer wood where pilot holes are not needed. The square edges cuts the wood fibers to open up the hole as apposed to a round point awl that only separates the fibers.

IMG_0177IMG_0178IMG_0182IMG_0180


IMG_0306IMG_0307IMG_0309IMG_0308

Shop made winkelhaak

2/12/2013 – So what is a Winkelhaak? It is Afrikaans for trisquare.

I have been unable to buy a small trisquare in the local market, despite trying for more than 18 months. So 10 days ago I decided to make a few from wood and a couple using a combination of wood and brass. They are so straight forward to make that I will not insult your intelligence by showing the steps involved. In the picture below you can see the collection of scrap pieces of wood I chose from to make them.

IMG_8641

Here you have the all-wood set. The two smaller ones have Kershout blades and Assegaai handles. The alpha-square has a Olienhout handle and Assegaai blade.

IMG_8654IMG_8655


The brass-wood squares are still in production. I will add pictures in due course.

9/12/2013 – And here it is, the first of two, the other one will have to wait until next year. It has a Stinkhout handle and a 6 mm thick brass blade.

IMG_8684IMG_8685IMG_8686