… and there was light.

14/4/2015

Since my bench was finished a month or so ago, it has been a struggle to see what I am doing as it is located in a part of the shop which is devoid of light. Recently I bought this basic study lamp and attached it to a short board to improve it’s maneuverability. Here are a few pictures to show how it lightens up my life.

IMG_4023IMG_4025IMG_4041

Clamping it to the bench enables me to have it hanging over the bench’s edge.

IMG_4039IMG_4053

It can also be clamped in the twin screw vise, legvise or my sliding deadman-cum-legvise. This helps to set it up as a raking light (second and third photo).

IMG_4138IMG_4139IMG_4140IMG_4141


It is incredible how much more accurate every aspect of my work has become since using a simple bench light. It is highly recommended.

Shop made Roubo-esque crosscut bow saw

13/4/2015

This is the second of a working set of bow saws that I am building at present. I decided to use Andre Roubo’s plates as inspiration for this one. If you are interested in this brilliant book by Lost Art Press, check it out here. The final picture in the series below is what I was aiming for.

IMG_4034IMG_4031IMG_4058

My bench while all this was going on.

IMG_4056

In terms of wood, I thought Assegaai (Curtisia dentata) would be perfect given it’s strength and resistance to splitting when flexed. In the pictures below you can see the pieces I selected. You might be able to see how the grain is running off to the side at one end of both pieces destined for the cheeks. I specifically chose it like this to follow the curve of the top end of the cheek, hence improving the strength.

IMG_4051IMG_4052

I used dividers to get a sense of the proportions of Roubo’s saw. One fixed measurement was the length of the saw blade (700 mm) as bought from Dieter Schmidt. I applied the proportions to this starting point to establish the length and width of the cheeks. In terms of the shape I simply drew something that followed the grain and added some artistic je ne sais quoi.

IMG_4057

I drilled and chopped the mortises in the cheeks prior to shaping.

IMG_4090IMG_4091

With the stretcher in position I marked out the correct location of the holes for the cross pin (6 mm or ¼” steel bolt in this case)

IMG_4059IMG_4060


20/4/2015

These holes were tapped and countersunk.

IMG_4092

Next step was to cut the kerf for the blade.

IMG_4085IMG_4087IMG_4089

I used the bandsaw to do the rough shaping.

IMG_4096IMG_4097IMG_4098

The lines to guide the next phase of shaping were drawn as shown, using my finger as a fence. It is quick and easy.

IMG_4099IMG_4100

The rest of the shaping were accomplished with spokeshaves, files and a card scraper.

IMG_4102IMG_4103

I used the same piece of Tamboti as mentioned in my previous post for the spindle of this saw. It was simply a bit bigger.

IMG_4105IMG_4113

A quick test fit. I really hope Brian Eve (Toolerable) does not get on my case again with regards to the string I used. I do not even know what this stuff is called, but it is cheap and available so that is what I went for.

IMG_4117IMG_4118

Tung oil treatment.

IMG_4119

Don’t you think Assegaai is exceptionally beautiful? I do. This saw hums through African hardwood. Viva Monsieur Roubo!!

IMG_4123IMG_4124IMG_4125IMG_4126IMG_4127

My next project will be a Fidgenian frame saw. The other saw I have built already is a 12″ bow saw. Go here if you want to take a look.

Shop made 12″ bow saw

13/4/2015

As you probably know by now, I am in the process of building a working set of frame/bow saws. For the small bow saw I decided on Witpeer (Apodytes dimidiata) to compliment the quality hardware from Gramercy tools. I also decided to use their design, as their reasoning for how they came up with their design made perfect sense, given all the other reading I did on the topic. This is a link to their plans. I found this discussion very helpful in terms of understanding the important design aspects.

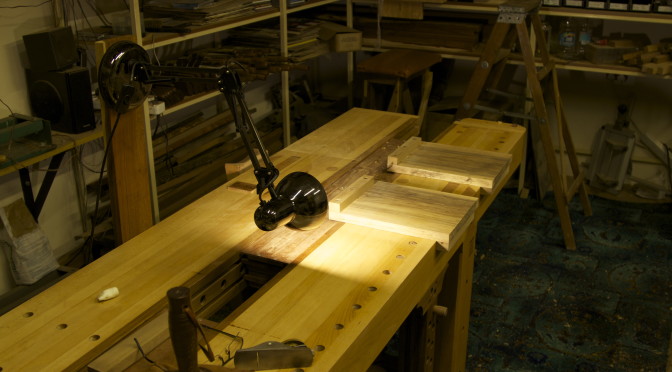
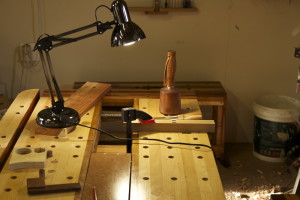
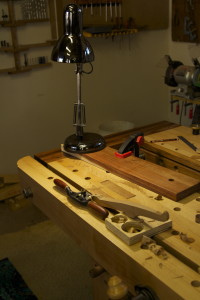
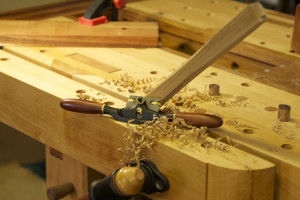
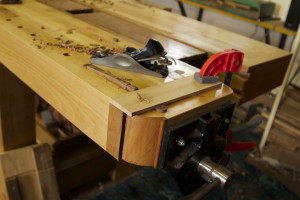
In the picture below you can see how my new bench light made it much easier than before to chop the two tiny mortises in the cheeks after removing the bulk of the material by drilling.

IMG_4023IMG_4024IMG_4025

The rough shaping was done on the bandsaw.

IMG_4026IMG_4027IMG_4028

Just a quick reminder of what the hardware looks like.

IMG_4029

The rest of the shaping provided me with an ideal opportunity to use my new spokeshaves from Veritas. We were in Johannesburg over the Easter Weekend, which meant that I could do some shopping at the Hardware Centre in Randburg. They usually have bits and pieces of Veritas tools lying around.

IMG_4038IMG_4039

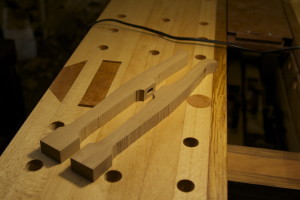
Sawing the tenons of the stretcher.

IMG_4040IMG_4041

IMG_4042IMG_4043

Shaping the stretcher.
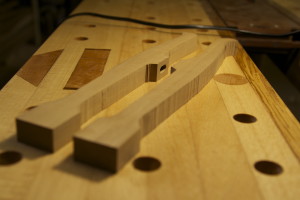
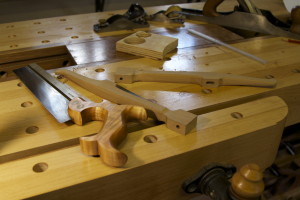
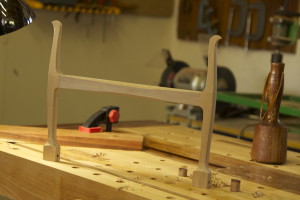
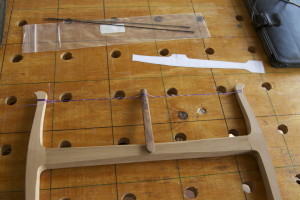
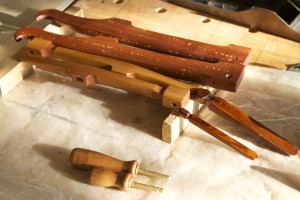
IMG_4044IMG_4045

First fit.

IMG_4047

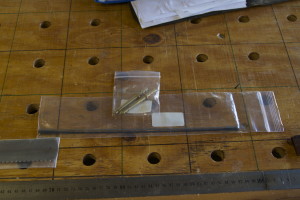
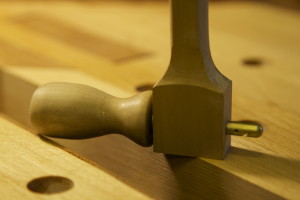
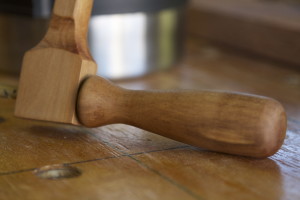
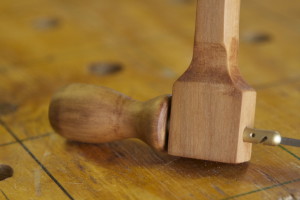
I then turned the handles and epoxied the brass pins into position.

IMG_4048IMG_4049

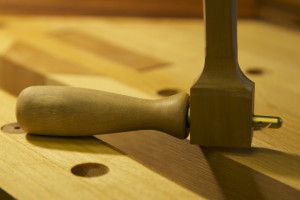
Fitting the handles.

IMG_4063IMG_4064IMG_4065

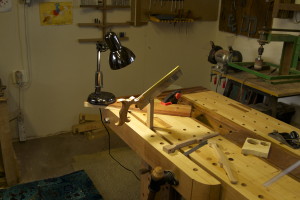
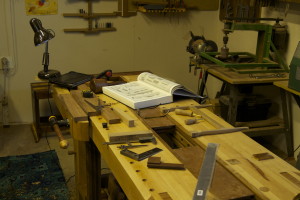
A picture to show what my bench looked like while building the first two bow saws.

IMG_4056

20/4/2015

For the spindle I found a Tamboti (Spirostachys africana) off-cut. This is as far as I am concerned one of the most precious African woods. If you want to know a bit more about Tamboti, use this link.

IMG_4104IMG_4105

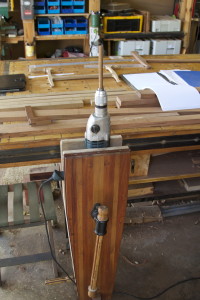
It is very difficult to turn small pieces like this in my lathe. Therefore I decided to used the method illustrated below to turn the Tamboti spindle.

IMG_4106IMG_4107IMG_4108IMG_4109IMG_4110

I flattened two sides of the lower section with a block plane.

IMG_4111IMG_4112IMG_4114

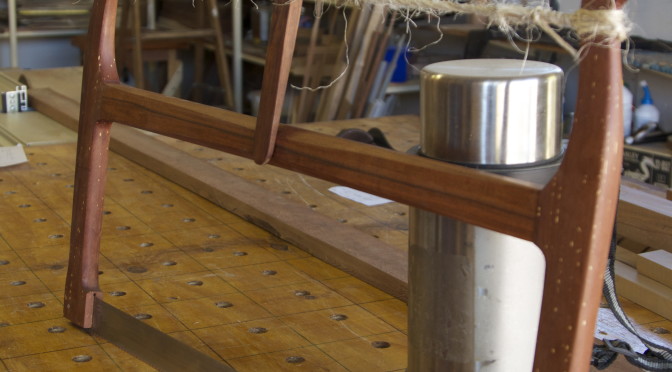
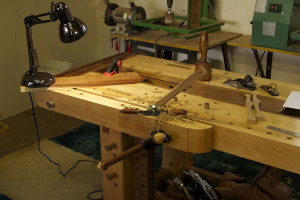
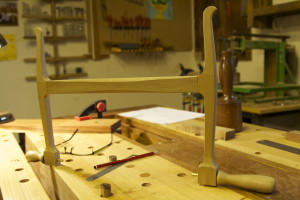
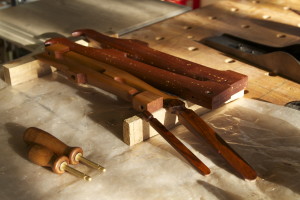
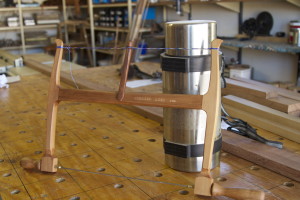
The first assembly prior to finishing …

IMG_4115IMG_4116


… which was followed by a Tung oil treatment. You can also see some of the parts of my monster Roubo-esque crosscut bow saw these pictures. I will write a separate post on that project, which should be publish later this week.

IMG_4119IMG_4120

There you go … one 12″ Witpeer bow saw completed.

IMG_4128

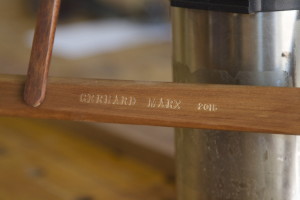
I recently bought an old number/letter punch set and tried it out for the first time on this saw.

IMG_4129IMG_4130IMG_4131IMG_4132

The Roubo Beast Master (to steel a term from Mark ‘Bad Axe’ Harrell) crosscut bow saw is also finished.

PS – Thank you to my friend Jonathan White (The Bench Blog) who taught me how to insert links.


Building a working collection of bow saws – The hardware

16/1/2015

One of my key projects for 2015 will be to build a working collection of bow saws. I bought the big blades (700mm in length) below from Dieter Schmid in Germany. The plan is to build a Frame saw using the rip blade and a Roubo-esque crosscut bow saw with the crosscut blade.

IMG_0191IMG_0192IMG_0193IMG_0194IMG_0195

A few pictures of the crosscut saw I want to replicate loosely.  It can be found in Lost Art Press’  “Book of Plates”. I cannot say enough good thinks about Lost Art and their books. Every book is a seminal work in itself, which makes it impossible to decide on a favourite. Surgeons in my part of the world have a motto: “If in doubt, cut it out”. My motto with Lost Art Press books is: “If in doubt, buy it”.

IMG_4034IMG_4031IMG_4058

These little beauties came from Gramercy Tools. I plan to build a smaller (12″) bow saw using their design. I plan to use it mainly from removing waste material between dovetails.

IMG_2706IMG_2707IMG_2708

The wood for these saws is the pile on the right hand side. I chose Witpeer (Apodytes dimidiata or White pear in English) and Assegaai (Curtisia dentata).  Both these woods are extremely tough, hard and durable, which made it some of the favourites for Wagon building in the early Cape Colony. My supply comes from the Knysna evergreen forest, where I bought it more than 14 years ago.

IMG_3111

I will write separate posts on the construction of each saw. To check out the other posts:

12″ bow saw

Roubo-esque crosscut bow saw

Fidgenian Frame Saw – part one

Fidgenian Frame Saw – part two

Shop floor with je ne sais quoi

13/4/2015

I suspect there are quite a few woodworkers out there who are convinced that I have lost the plot a long time ago. If you are one of them, then this post will be the final evidence you need.

I have a problem in that my shop has a concrete floor. It has caused quite a bit of unnecessary swearing and sharpening after dropping a chisel or a plane blade. My slightly camp quick-fix solution to the problem was to cut appropriately sized chucks off this hideous old carpet to drape around my bench!

Now if that does not create a workshop ambiance for a real man, then I don’t know what will!

IMG_4035IMG_4036IMG_4037

Shop made saw benches – 3

16/3/2015

My daughter thought it was necessary to strike a pose on the (first) finished saw bench.

IMG_3469IMG_3470IMG_3468

25/3/2015

I moved on to the second of the two benches to be finished. Here you can see how useful the split-top (design of my workbench) can be for operations like this. I am marking out the pins, using the tails as a template for those of you who are unsure what “operations like this” means.

IMG_3517IMG_3517IMG_3518

Here I am fitting the dovetail joint.

IMG_3520IMG_3521

The second saw bench after being glued and screwed.

IMG_3744

This is another example of how the open end of my split-top provides additional work holding options compared to a conventional design. In the picture I am chopping off the protruding waste of the wedged through mortises.

IMG_3745IMG_3746

1/4/2015

I thought it might help to point out the few design improvements I made to the saw bench. As stated earlier in this series of posts, I used the design of Ron Herman as a starting point. I added the strips of wood as pictured to improve the grip of a holdfast as it increased the depth of the dogholes from ¾” – 1½”. It obviously also adds some strength.

IMG_3919IMG_3920IMG_3921


I removed some wood (arch shape) from the footing to improve it’s stability on an uneven floor.

IMG_3922IMG_3923


I drilled the two big holes in the end boards as grips when carrying the bench with two hands. The elongated grip hole in the top enables one to carry or move the bench with one hand. You will also notice the amount and position of holdfast holes.

IMG_3924IMG_3925


I gave the finished benches a liberal treatment of a tung oil, diesel and turps mixture before the long weekend.

IMG_3927IMG_3928IMG_3929IMG_3930IMG_3931


Now that they are done I need to move on to building a few bow saws and a frame saw.