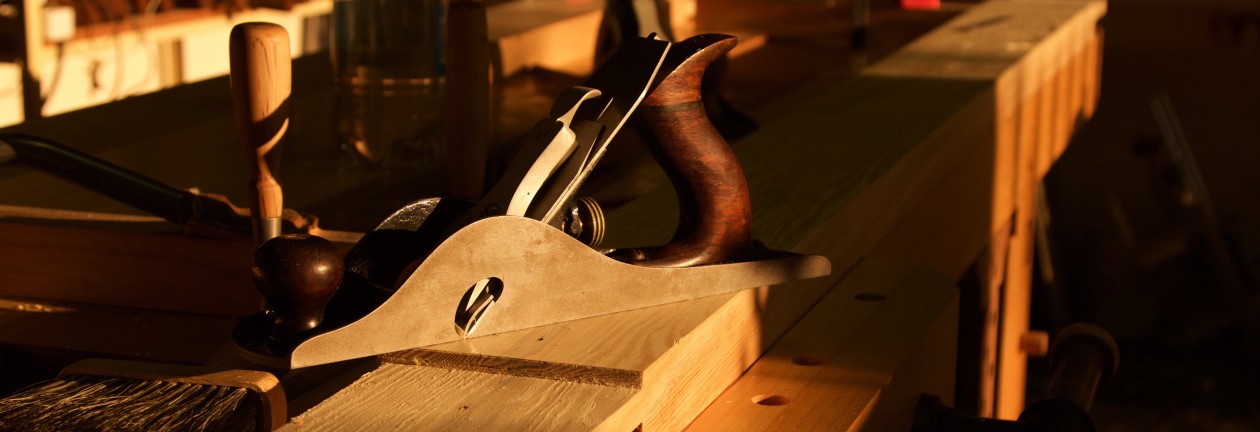
Tour de shop and project inventory 2015

30/11/2015

Once again, as per usual, it is time to review what happened this year at Je ne sais quoi Woodworking. It has been without a shadow of doubt the most exciting year since starting on this journey in March 2013. The most encouraging aspect was the increase in exposure of the website. Until February 2015 I had no clue whether anyone out there has ever even seen the website.

In February I saw a comment by Siavosh Bahrami on Joshua Klein’s website were he invited woodworking bloggers to contact him if they wanted to be included on his aggregator www.woodspotting.com. I wrote to him and he was most helpful in adding Je ne sais quoi Woodworking straight away. It had an immediate effect on the site’s exposure. I want to thank Siavosh sincerely for the gesture.

Another major bonus of my inclusion was that all of a sudden I found heaps of other blog sites that I did not know of before. In particular, I became good friends with Jonathan White at www.benchblog.com. I really value his thoughts as we have discussed various topics via e-mail since becoming acquainted. Thank you Jonathan, it is a real pleasure to correspond with such a passionate and precise woodworker.

I also met Brian Eve of Toolerable. He seems to be one of the woodworking blogosphere’s glitterati  who knows just about every noteworthy blogger. I was humbled by his gesture to include my site in his Blog list, but he did give me a lot of grief over my choice of string for a bow saw and shop carpet! 🙂 Thank you Brian.

Another new woodworking friend I would like to mention is Robert (Bob) Demers of The Valley Woodworker. He is a real legend in terms of his knowledge of hand tools and allround demeanour. I really appreciate the regular correspondence we’ve had over the past year. Bob and his wife Heather is currently going through a very tough time with her illness and treatment so I would urge everyone who is part of this wonderful online community to show them support. Thank you Bob!

At some point I also wrote to Leif Hanson at Norse Woodsmith. He runs the other major woodworking blog aggregator on his site. Again I was in luck as Leif was so kind as to add Je ne sais quoi woodworking to the aggregator. It led to even more exposure and I would like to thank him immensely for that. Thank you Leif!

Tour de Shop at the end of 2015

The area in front of the shop did not change much, apart from the decking timber added to the sliding gate for more privacy.

IMG_5550

This part of the shop did not change at all, but it is clear from the amount of stuff one the assembly table that I am juggling too many projects at present.

IMG_5540IMG_5541IMG_5547IMG_5548IMG_5549IMG_5551

It has been the first year of working on my shop built bench and it is a real pleasure.

IMG_5552IMG_5553IMG_5555

The bench against the far wall was also built this year.

IMG_5556IMG_5557IMG_5558

As you can see here my collection of kids art grew significantly over the past year.

IMG_5559IMG_5560

No changes here either.

IMG_5561IMG_5563IMG_5562

Project inventory 2015

I started on this chopping board at the end of 2014 and it was probably the first project that got finished in 2015.

IMG_2995IMG_2996

My first real workbench was already assembled by the end of 2014, but received all of it’s armoury in the first few months of 2015.

IMG_3013IMG_3028IMG_3050IMG_3053IMG_3075IMG_3107IMG_3121IMG_3305IMG_3314

Who can forget the inauguration party of the bench.

IMG_3542

An important step in my slow journey towards a hand tool dominant approach was to build two excellent saw benches.

Part 0ne

Part two

Part three

IMG_3927IMG_3929

At Je ne sais quoi Woodworking it was the Year of the Saw. This is a 700 mm blade from Dieter Schmidt in an Assegaai bowsaw based on a L’ art du menusier plate.

IMG_4123

Based on the amount of hits, these holdfast boots I made was definitely my most popular idea/post of the year.

IMG_4444IMG_4455

Speaking of woodworking fame, the series of posts I wrote on building this frame saw earned me an honourable mention by one of my personal icons. Tom Fidgen is one of the leading hand tool woodworkers around the globe. He posted a link to my posts on his site and I want to thank him sincerely for that.

Entro

Part one

Part two

Part three

IMG_4646IMG_4650IMG_4645

Reconditioned this pre-1900 Stanley no. 66 Beadingtool.

IMG_4693

Reconditioned this Shaw’s Patent Jack plane from Sargent.

IMG_4818IMG_4820

Unexpectedly, building another bench ended up being the major project of 2015. I just had to utilise the unbelievable Scotts Pine (Pinus sylvestris) timber I came across by sheer luck.

IMG_5150IMG_5177IMG_5193IMG_5204

Seeing that I am a huge David Charlesworth fan, I just had to find and restore a Bailey no. 5½ Jack plane.

IMG_5213

A rolling pin for the beach house.

IMG_5419IMG_5420

Restored this exceptional type 8 Bailey no. 8 Jointer.

IMG_4754

Built this 12″ bow saw (Please note the string that earned me so much abuse from Brian Eve).

IMG_4128IMG_4130IMG_4131IMG_4132

Hovering skeleton tool chest.

IMG_3473IMG_3475IMG_3484

Japanese toolbox inspired knife and fork carrier.

Part one

Part two

Part three

IMG_5542IMG_5543IMG_5544

Boorish pencil sharpener

IMG_4988

Seeing that the concrete floor in my shop can be harmful to any tool that gets drop, I decided to use this old carpet as a temporary solution. It is hideous, I know.

IMG_4037IMG_4036

Finally, I want to thank everyone who drops in from time to time to read what I am up to. It is much appreciated and I hope that you will come across stuff that will inspire new ideas for your own journey.

Tour de Shop and project inventory 2014

13/11/2014

My last proper weekend in the shop for 2014 has now come and gone. It is therefore now time to start reviewing what I have managed to accomplish during this year and to take a quick look around the shop.

It all started with the rehabilitation of the two planes I happened to buy at an antiques sale in RSA over the December holidays. The Bedrock no. 606 has become one of my go-to tools.

http://www.jenesaisquoiwoodworking.com/resurrection-of-two-cast-iron-fore-planes/

IMG_9022IMG_9024IMG_9036IMG_9604IMG_9605IMG_9607IMG_9608


I also bought this no.78 Rabbet plane from Stanley at the same auction, but it’s rehab took quite some time as it had several parts missing.

http://www.jenesaisquoiwoodworking.com/stanley-no-78-rehabilitation/

IMG_9038IMG_9040IMG_9041IMG_9981


This was the last of my holiday shopping, a no. 45 Plough Plane from Stanley. It was covered with a thick black paint, and had no iron/s. I decided to tidy it up for shop decoration purposes.

http://www.jenesaisquoiwoodworking.com/stanley-no-45-rehabilitation/

IMG_9044IMG_9621IMG_9622IMG_1772IMG_1773IMG_1774IMG_1775


I managed to finish turning all those file handles that I started with at the end of 2013.

IMG_9596


My major project for 2014 started on the 1st of February and is not finished by quite some way. I spent at least 80% of my shop time this year working on my 18th century workbench and am pleased to say that it is at least assembled by the end of 2014. You can read all about it in a series of posts entitled “My 18th Century Workbench in progress”

IMG_9580IMG_9581photo 3photo 4


My 17 m³ wood finally completed it’s journey when it took occupation of it’s purpose built shed.

http://www.jenesaisquoiwoodworking.com/the-lumbering-odyssey/

IMG_9643IMG_9642IMG_9804IMG_9654IMG_9661IMG_9671IMG_9857IMG_9860

These exquisite chisels from Lie-Nielsen arrived after a wait of several months. I made this very basic storage to keep them out of harm’s way.

http://www.jenesaisquoiwoodworking.com/chisel-storage/

IMG_0005IMG_0003IMG_0004


Didi (my son) started his woodworking journey by turning this mallet for himself.

IMG_0071IMG_0072


I used an antique brace bit from my father’s collection that had key parts of it’s business end missing to fashion this birdcage awl. It is a real winner.

http://www.jenesaisquoiwoodworking.com/brace-bit-birdcage-awl-also-known-as-bbba/

IMG_0128IMG_0180

Didi’s next project was this bird feeder.

IMG_5595

I revamped and sharpened this old scissor.

http://www.jenesaisquoiwoodworking.com/scissor-rehab/

IMG_0201IMG_0215IMG_0227

This shop high stool saw a bit too much action during the 14 years since I first made it. I re-upholstered it with leather and strengthened the base, while (clearly) not worrying too much about je ne sais quoi.

http://www.jenesaisquoiwoodworking.com/shop-high-stool-facelift/

IMG_0330IMG_0337

Didi learnt a few more skills by producing this beautiful Assegaai handle for an old axe we had lying around.

IMG_0418IMG_0421IMG_0422

This Miller’s Falls no. 88 joiner gauge was successfully rehabilitated.

http://www.jenesaisquoiwoodworking.com/millers-falls-88-perfection-jointer-gauge-rehab/

IMG_0913IMG_0907

The wife and I managed to make a team effort of the re-upholstering of “die rooi bank”.

http://www.jenesaisquoiwoodworking.com/die-rooi-bank/

IMG_1071IMG_1084IMG_1078IMG_1101IMG_1148IMG_1412IMG_1414

In order to hand plane the two edges of my benches top parallel, I had to first build this large panel gauge.

http://www.jenesaisquoiwoodworking.com/makeshift-panel-gauge/

IMG_1360IMG_1361IMG_1362IMG_1364

In order to create the space for my 18th century bench, I had to rearrange  some of the power tools. This planer and radial arm saw were placed on the same steel table and lined up to become each other’s out-feed table.

http://www.jenesaisquoiwoodworking.com/level-playing-field/

IMG_1404IMG_1405IMG_1406

A set of winding sticks.

http://www.jenesaisquoiwoodworking.com/shop-made-winding-sticks/

IMG_1493IMG_1494IMG_1749IMG_1751

My favourite shop made wooden plane received some cosmetic surgery. I added a thin strip of Tamboti to it’s chipbreaker/lever cap and covered the lever cap screw with Kaapse Swarthout. This is a true workhorse as it makes short work of all scrub plane and very aggressive fore plane tasks.

http://www.jenesaisquoiwoodworking.com/scrub-plane/

IMG_1664IMG_1713IMG_1714IMG_1715IMG_1716

My own version of a Melencolia Square.

http://www.jenesaisquoiwoodworking.com/shop-made-melencolia-square-with-the-marxian-improvement/

IMG_1735IMG_1736IMG_1739IMG_1740IMG_1741IMG_1742

Custom made leather apron.

http://www.jenesaisquoiwoodworking.com/custom-made-leather-apron/

IMG_1743IMG_1744IMG_1745IMG_1746IMG_1748

Restored a Stanley no. 10 Rabbet plane (ca 1900) and a Bedrock no. 607 Jointer.

http://www.jenesaisquoiwoodworking.com/stanley-no-10-rabbet-plane-rehab/

http://www.jenesaisquoiwoodworking.com/stanley-bedrock-no-607-jointer-rehab/

IMG_1804IMG_1799IMG_1800IMG_1976IMG_1978IMG_1979IMG_1980

Replaced my ½” Lie-Nielsen mortice chisel handle with a shop made Ysterhout version. So far it is standing up to heavy abuse without breaking a sweat.

http://www.jenesaisquoiwoodworking.com/replacing-lie-nielsen-mortise-chisel-handle/

IMG_2180IMG_2169


A custom made pairing handle for my bevel edge chisels.

http://www.jenesaisquoiwoodworking.com/shop-made-pairing-handle-for-my-lie-nielsen-bevel-edge-chisels/


IMG_2170

Finally got round to making an Ysterhout straight edge.

http://www.jenesaisquoiwoodworking.com/shop-made-ysterhout-straight-edge/

IMG_2270IMG_2271IMG_2272

Restored this Stanley no. 203 bench clamp.


IMG_2286IMG_2289IMG_2329

Restored this Stanley no. 9½ block plane.

http://www.jenesaisquoiwoodworking.com/stanley-no-9½-block-plane-rehab/

IMG_2482IMG_2483IMG_2485IMG_2486IMG_2512IMG_2641IMG_2643IMG_2645IMG_2644

I started restoring this Stanley no. 8 Jointer (ca 1896), but there is a lot more work to do next year. I will replace both tote and knob.

IMG_2478IMG_2479IMG_2481IMG_2487IMG_2618IMG_2619


Tour de Shop at the end of 2014

This is simply a series of photos documenting the state of the shop at the end of 2014. The major change from last year has been the addition of the assembled (though not finished yet) 18th century style workbench. I also managed to collect quite a few new hand tools with the help of Patrick Leach and Jim Bode. As I am writing this my first shipment from Jim has not arrived yet despite leaving the States on the 12th of October. My guess is I will never see those tools or money again. Just one of the joys of living in Africa.

(9/1/2015 – I am very happy to report that the shipment arrived in Namibia on the 6th of Jan 2015 without as much as a scratch. I will write a post on this saga in the near future)

IMG_2620IMG_2621IMG_2622IMG_2623IMG_2624IMG_2625IMG_2626IMG_2627IMG_2628IMG_2629IMG_2630IMG_2631IMG_2632IMG_2633IMG_2634IMG_2635IMG_2636IMG_2637

Level playing field

23/6/2014

On Sunday I finally made the effort to set up my radial arm saw and my planer (both DeWalt but from different eras) on the red steel table (first photo). About eight weeks ago I took the radial arm saw off it’s custom steel table and bought a new cross cut blade for it. I decided to move it to the red steel table to create more space for my new 18th century workbench that I am in the process of building. It used to reside next to the red steel rack that house all my offcuts (second photo).

IMG_1393IMG_9582

In order for these two power tools to be functioning next to each other I had to get them on the same plane. That meant that I had to lift the planer.

IMG_1394IMG_1395IMG_1397

Here you can see how the radial arm saw now acts as an out-feed table for the planer and vice versa. It took ages, fiddling around with different strips of wood to line the two surfaces up perfectly.

IMG_1398IMG_1399IMG_1404IMG_1405

I also flipped the old chip board over that did duty as the radial arm saw table and made a new fence. Once I managed to set the saw up perfectly square in the two important dimensions, I cut a new zero clearance groove through the fence.

IMG_1400IMG_1401IMG_1402IMG_1403

… and finally I cleaned the track in which the saw runs, which had heaps of antediluvian grease- sawdust-crap obstructing the saw’s path. A fresh serving of grease got it back to it’s former self.

IMG_1406IMG_1407

Project inventory 2012

The major project of 2012 was the assembly table I built, which was also intended to act as a makeshift workbench until I manage to gather a bit more information and skills to build a dedicated one.

http://www.jenesaisquoiwoodworking.com/alternative-workbenchassembly-table-chapter-one/

http://www.jenesaisquoiwoodworking.com/alternative-workbenchassembly-table-chapter-two/

http://www.jenesaisquoiwoodworking.com/alternative-workbenchassembly-table-chapter-three/

http://www.jenesaisquoiwoodworking.com/alternative-workbenchassembly-table-chapter-four/

http://www.jenesaisquoiwoodworking.com/alternative-workbenchassembly-table-chapter-five/

100_0293100_0285100_0271100_0258

I invented and made these benchdogs which works like a charm. I include a photo of how I used it this past weekend while working diagonally across a heavy beam of Witpeer with my shop made scrub plane. They are known in my shop as Bench Bitches.

http://www.jenesaisquoiwoodworking.com/bench-bitches/

100_0295100_0277IMG_0160

One Effulgent Arm.

http://www.jenesaisquoiwoodworking.com/extremely-efficient-effulgent-arm-eeea/

100_0573100_0523

Saw Hook

100_1129100_1130100_1131100_1133

Chopping board for the beach house

100_0582100_0583IMG_3235

Sushi plates

100_0584

Knife rack for the beach house

100_0882100_0883

Sun oven for the beach house

IMG_4031IMG_4032IMG_4033


Dowel plate

100_0558


Spice rack for the beach house

100_0933100_0940


Tour de Shop and project inventory 2013

11/11/2013 – Just before I finally left my shop on Sunday evening, I took some photos of how it looks at the end of 2013. Hopefully this type of post will help me to see at some point in future that I am actually making progress. Since the shop tour photos of 2011, things changed quite a bit.

This first photo shows what is currently on my bench. At the back on the right hand side is the shooting plane I am working on. So far (excluding the shooting plane) I have managed to build 7 wooden planes during 2013. They are a Petite Smoother, a Jack Plane, a Fore Plane, a Jointer, a Scrub Plane, a Shoulder Plane and a Flush Plane. Here is a link to a gallery of photos of these planes http://www.jenesaisquoiwoodworking.com/shop-made-wooden-plane-show-off/ I also wrote a post on how I built each of these which you will find under the category “Handtools”.

In the front left, you can see the Witpeer stock ready to become file handles. Behind that is an area set up to treat the handles with tung oil and Wooddock as they are turned. I am about half way with this project.

IMG_8576

My main tool cabinet (by lack of a better word) has experienced several changes this year. Some tools were added (most notably the Proletarian sanding contrivances), some were moved (ie the files and chisels) and some moved to the opposite side of the bench (ie the planes and drill bits). I finally arranged easy access for all my small Bessey F-style clamps (last picture), which has made a huge difference to my efficiency. You can read more about this in the following post http://www.jenesaisquoiwoodworking.com/stingy-storage-ideas/

IMG_8577IMG_8578IMG_8579

As I said my planes moved across the bench to were I do most of my hand planing.

IMG_8645IMG_8646IMG_8647


This is the area that I want to target next year. The bandsaw needs to move around the corner towards the left, while being lined up (height-wise) with the radial arm saw and the planer. This will created the space for my proper beech Holtzapffel bench, which will be my number one priority to build in 2014. The drill press might also move a bit to the right were the Kershout boards are standing up against the wall.

IMG_8580

It is in this channel where I plan to line up the three mentioned power tools.

IMG_8581

The green bench in the corner will move down to the shed where my wood will be store by next year. If you want to read more about that project see this post http://www.jenesaisquoiwoodworking.com/the-lumbering-odyssey/

My idea is to set up a rough lumber processing plant (probably a bit too dramatic of a description but anyway) down there in the shed. Then I will be able to cope with the tools and setup in this shop in terms of milling, shaping and cutting the tamer wood from the mentioned plant. Watch this space.

IMG_8582


The future wood storage and rough processing shed.

IMG_7612IMG_7613IMG_7614

These are makeshift wood storing hooks hanging from the rafters. I use this to get wood acclimatized to the shop, while trying to get a better arrangement in place, which is part of the project mentioned above. These hooks will hopefully disappear once the majority of my wood is in the shed, which will enable me to acclimatize wood in the garage that is currently housing the wood.

IMG_8585


I thought it would also be a good idea to list the projects that I have managed to complete in 2013, while it is still relatively fresh in my mind.

The Legvise was finished in 2013 although I already started on it towards the end of 2012.

http://www.jenesaisquoiwoodworking.com/legvise-with-a-twist-chapter-one/

http://www.jenesaisquoiwoodworking.com/legvise-with-a-twist-chapter-two/

http://www.jenesaisquoiwoodworking.com/legvise-with-a-twist-chapter-three/

100_1221

The sliding deadman.

http://www.jenesaisquoiwoodworking.com/sliding-deadman-with-a-twist/

IMG_6996IMG_5869

IMG_7901


A set of six sanding planes (three short and three long) each with a different grit sandpaper

http://www.jenesaisquoiwoodworking.com/proletarian-sanding-contrivances/

IMG_7935IMG_6928

The following planes:

Scrub Plane (http://www.jenesaisquoiwoodworking.com/scrub-plane/)

IMG_8272IMG_8201-2IMG_7532IMG_7561IMG_7559IMG_7587

Petite Smoother (http://www.jenesaisquoiwoodworking.com/petite-wooden-smoothing-plane/)

IMG_8299IMG_8199

Jack Plane, Fore Plane and Jointer http://www.jenesaisquoiwoodworking.com/building-a-wooden-jack-plane/

http://www.jenesaisquoiwoodworking.com/building-a-wooden-fore-plane/ http://www.jenesaisquoiwoodworking.com/building-a-wooden-jointer/

IMG_8291

Shoulder Plane (http://www.jenesaisquoiwoodworking.com/building-a-wooden-shoulder-plane/)

IMG_8357IMG_8332

Flush Plane (http://www.jenesaisquoiwoodworking.com/shameless-flush-plane-knockoff/)

IMG_8339


A set of marking tools

http://www.jenesaisquoiwoodworking.com/tamboti-and-witels-marking-knives/

http://www.jenesaisquoiwoodworking.com/apodytes-dimidiata-scratch-awl/

http://www.jenesaisquoiwoodworking.com/another-scratch-awl/

IMG_8569


I rehabilitated my father’s old Stanley Bailey no.4 and no.5 handplanes and replaced their blades with brand new Lie-Nielsen blades.

http://www.jenesaisquoiwoodworking.com/old-stanley-bailey-handplane-rehabilitation/

IMG_6814 BeforeIMG_6883 After

100_1202 Before

IMG_6881 After

A Sealskin strop

http://www.jenesaisquoiwoodworking.com/reprobate-sealskin-strop/ (by the way this is by far the most read post on this site, on 12 November 2013 it reached 1000 hits)

IMG_7128IMG_7127

Five wooden mallets

http://www.jenesaisquoiwoodworking.com/mallet-mania/

100_1273IMG_5828IMG_5694IMG_8672IMG_8673IMG_8674IMG_8675IMG_8676IMG_8677IMG_8678IMG_8679

Plane hammer

http://www.jenesaisquoiwoodworking.com/plane-hammer/

IMG_7313IMG_7315

Tuned my bandsaw and built a bandsaw mitre-sled

http://www.jenesaisquoiwoodworking.com/bandsaw-mitre-sled/

IMG_7074IMG_7076IMG_7080IMG_7081IMG_7146

Heaps of file handles (I will probably not finish this project before the end of 2013)

http://www.jenesaisquoiwoodworking.com/file-handle-mania/

IMG_8563IMG_8537IMG_8504IMG_8508


Glue roller

http://www.jenesaisquoiwoodworking.com/glue-roller/

IMG_8524IMG_8560


Drill bit shelve

http://www.jenesaisquoiwoodworking.com/drill-bit-shelve/

IMG_8060IMG_8052IMG_8051

Sandpaper storage cabinet

http://www.jenesaisquoiwoodworking.com/sandpaper-storage/

IMG_6918IMG_6926IMG_6925


Card scraper holder

http://www.jenesaisquoiwoodworking.com/card-scraper-holder/

IMG_6740IMG_6744


Plane stops of different lengths and four bench hooks

IMG_5879DSC03192DSC03193DSC03191


Three similar jigs for routing dados, each for a different diameter dado bit

100_1178100_1179100_1233100_1235


Not sure what this thing is called but it stops your vise from racking.

IMG_5881

Sharpening jig based on a design by Deneb Puchalski (see the Lie-Nielsen site for a pdf version of his jig)

http://www.jenesaisquoiwoodworking.com/my-version-of-denebs-sharpening-jig/

100_1245100_1231100_1246IMG_6747IMG_6754IMG_6755

A set of shop made trisquares.

IMG_8654IMG_8684IMG_8685IMG_8686

Rehabilitation of this egg beater drill.

IMG_8651IMG_8656

Capscrew/Chipbreaker/Deadman screwdriver

IMG_8643IMG_8644

Spice rack

100_1244100_1256100_1258


Wooden plates for braaivleis!!


IMG_8667IMG_8680

Whoa-oa-oa! I feel good, I knew that I would, now
I feel good, I knew that I would, now
So good, so good, I got you (James Brown)