

16/11/2016
The year is hurrying towards it’s inevitable end and the temperatures in my tropical haven are racing upwards at the same rate. The massive shift in ambient humidity that a good rainy season can induce always wind me up to get joinery that is supposed to last a really long time assembled during the driest part of the year. In my case that means before the end-of-year holidays, as the proper electric storm driven downpours tend to ignite a sudden hike in humidity around mid January. That is of course if we are lucky, because water has been in short supply in this sweltering savanna of ours.
For the purpose of this project I wanted to get the two leg-assemblies done before we leave for a hitherto tranquil spot on the Azanian south coast. Unfortunately the Zuptopian conglomerate has since done it’s utmost to “poison and destroy my brothers”, but let’s not dwell on the bane of my life while we could be discussing woodwork.
As discussed before, I prefer using Assegaai for my custom made drawbore pegs. I usually try and find a perfectly straight-grained piece before ripping strips on the table saw that are then fed to my Stanley no. 77 dowel making machine (not pictured). Unfortunately it is pretty much impossible to split (as apposed to rip) stock along the grain then using the no. 77 as you need perfectly square strips, but if you use fairly straight stuff it still turns out dowels that are far superior to the rubbish bought in local stores. I wrote in more detail on this process in previous posts.


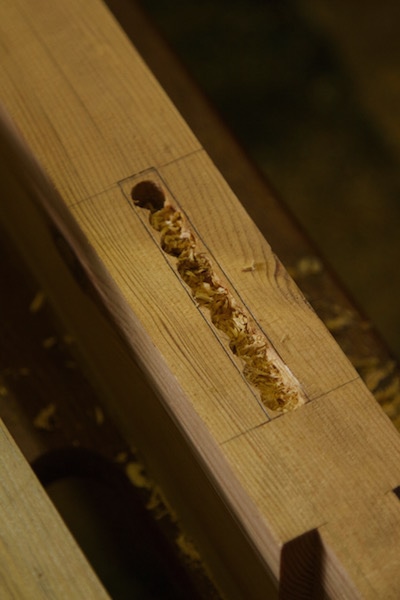
For the sake of trying something new I decided not to go with wedged through tenons as I did with the two workbenches that was built with similar sized stock. I am however partial to the idea of using wedges to ensure maximum strength. Therefore it was decided to experiment with wedges in a closed mortise. You will notice the kerf prepared for the wedge in the monstrous tenons. The sides of the mortise that needs to allow for the wedge to expand the tenon were adjusted. Then it is simply a matter of positioning the wedge in such a way that it sits in the entrance to the mentioned kerf while using pipe clamps to coerce the tendon into it’s mortise. That is of course followed by tapping the drawbore pegs home while the clamps are still in situ. The pictures below also show how I used my Festool Domino to cut the slots for the bits of wood that will fix the aprons to the top.


16/1/2017
The drawbore pegs were then worked flush by sawing and hand planing.


In order to mark out the exact location of the tenons of the two beams that link the two beams between the leg-assemblies (at an angle), I had to assemble the undercarriage.


By clamping the linking beams at exactly the right angle, I was able to mark out the shoulders of the tenons.


For some reason I found it very difficult to keep to the marked out lines while sawing away the waste by hand. It was the first time that I encountered this problem and still do not know exactly what was going on as I have done many similarly sized tenons in the same wood with the same saw?? Therefore I switched to the bandsaw for the rest of the work.


I usually like to saw close to the line and hone in on it by planing the cheeks to a perfect fit.


Marking out the location of the mortises.

15/3/2017
Drilling out waste.


Removed the rest of the waste by vertical chopping.


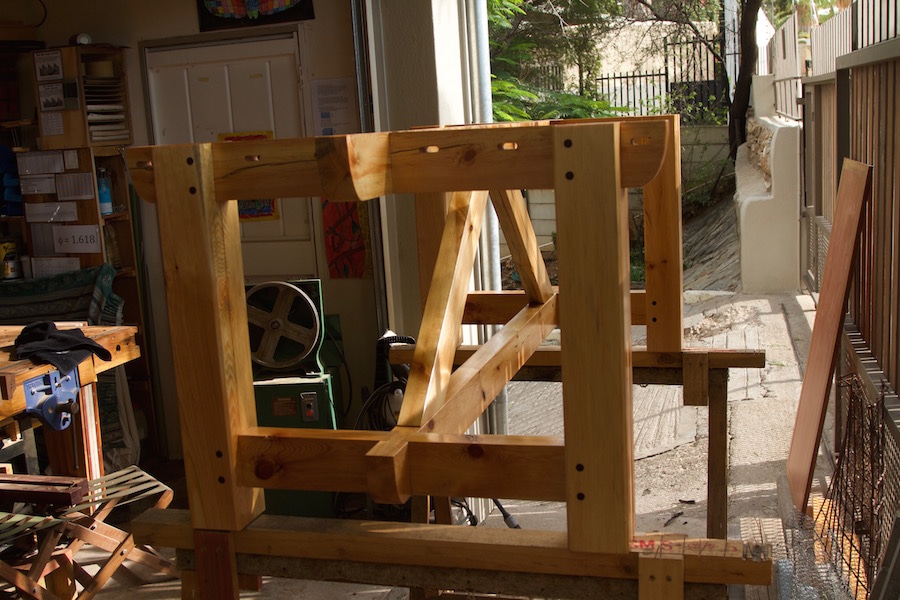
Then it was time for the final glue-up of the undercarriage. I was very happy with how it came together and it sure is a robust construction.


The undercarriage received a few layers of Woodoc.

Before installing the undercarriage, the bottom of the top received a few layers of boiled linseed oil.
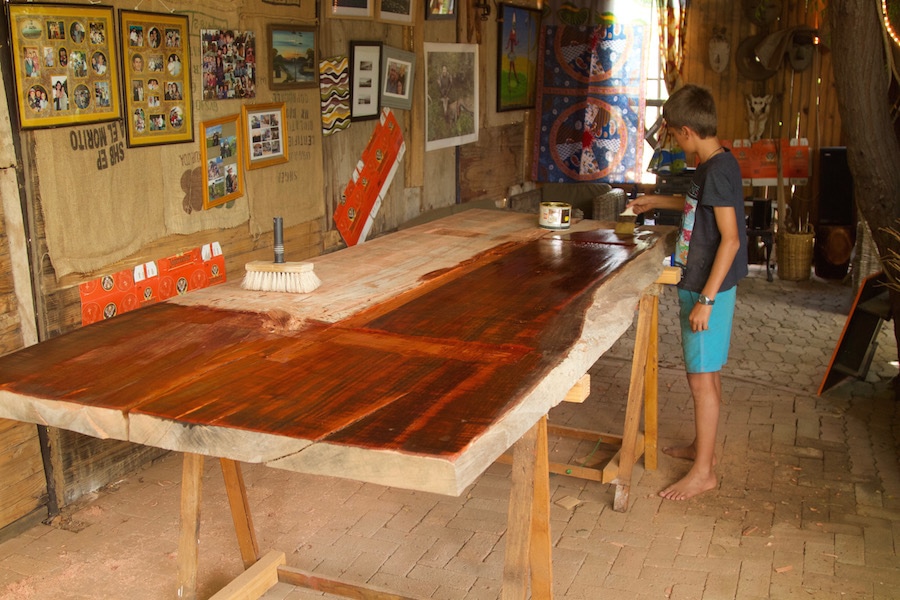


The pictures should do a better job than words to explain how the top was fix to the undercarriage.


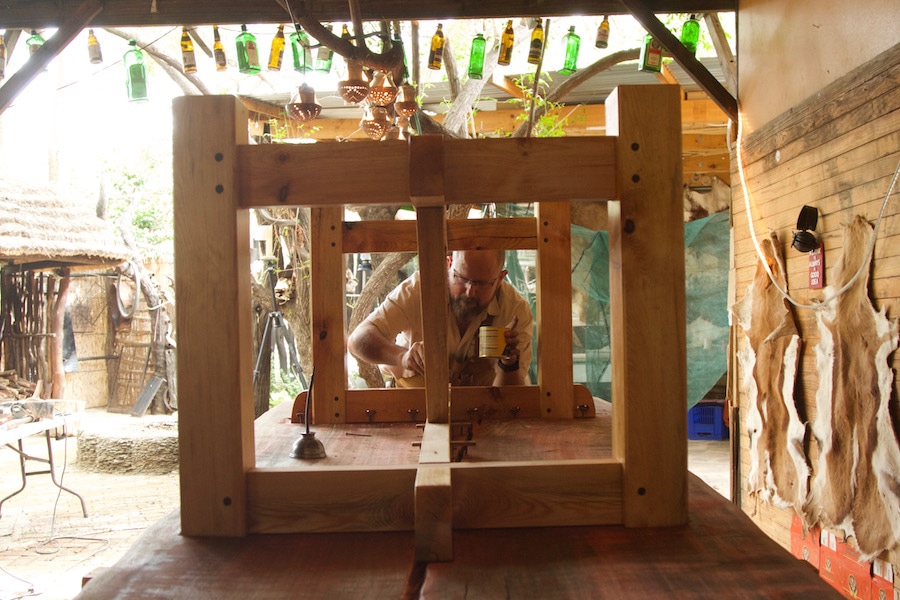

Once that was done it became time to bring in some strength to get this baby to it’s feet.
Now I have to flatten the top by hand and trust me it looks a lot flatter than it is in the pictures below. I hope to complete this task before the end of the year.


Interesting way to attach the top, never seen that before. It sure should have enough play to accommodate.
Good to see the “Tool Model” in good form, I trust she has fully recovered by now
Bob and Rudy waiting for the garage to bring my car back
Yes Bob that is a strategy to attach the top that I dreamt up and have not seen it elsewhere either. It is to be honest simply a variation of the more tradition ways of doing it, but hopefully slightly stronger while still allowing for movement.
The tool model is very close to full recovery.
Hope the car comes back soon.
Gerhard
Wow… That is phenomenal!!! I love it. The joinery that you used and the size of the timbers should make that thing bomb proof. Are you planning on parking a car on top of it?
I was thinking as I read through your post, about timber selection. I always try to find the clearest, knot free wood that I can when building something. But after seeing what you’ve done here, I think I’m doing it wrong. The knots and checks in the undercarriage you made add soooo much character. It really does look fantastic, well done. Thanks for making me rethink things.
I hope that you are all well. Did you get my last email? I didn’t hear anything back from you, so wasn’t sure.
All the best,
Jonathan
Jonathan my friend
Thank you for the compliments, I really value your opinion. I might not park a car on it, but it is very likely that the table will be faced with several inebriated adults jumping/dancing on it from time to time.
The issue of timber selection in this case was not so much an artistic endeavour as I used the some of the stockpile of reclaimed Pinus sylvestrus I found a few years ago. It has spent quite some time outdoors and was riddled with nails, which explains the somewhat rustic appearance. I do however prefer wood with interesting features such as what you mention and agree that it can really add something to the finished piece. Every check, knot and nail hole helps to tell the story of that particular piece of wood and that is what I like.
I did receive your mail when we were discussing the new Roubo book. I have been very distracted with all the political drama we have been face with, but will do my best to send an update in the next day or so.
Thanks again mate.
Gerhard
This is going to be one massive gorgeous table…
Bob, sipping his morning coffee while Rudy stuff his face