1/2/2016
Seeing that my planer is still in ICU I am continuing to do the odd little jobs that does not get done once the major projects start in all earnest. One of those jobs that has been on the list for a few years is a shop made saw vise. Once again my e-mail advisor Mark Harrell of Bad Axe Tool Works sent me in this direction. He told me about an article in the August edition (#219) of Popular Woodworking by Jason Thigpen. Apparently Mark is using one of these himself and finds it exceptional.

I found scrap pieces of beach and something I though was Tasmanian Blackwood for the job. At this stage I think it might actually be Walnut, but I am not too sure. While living in New Zealand I restored a few riffle stocks of Walnut and this seems to be quite similar. I am a bit confused about where it came from though. Clearly it was in my father’s pile of wood that came my way, but I do not recall him ever using walnut for any project.
Unfortunately both piece of scrap were significantly twisted, but fortunately thick enough to be planed out. Both these species are so hard that it took me a whole day to get rid of the twist, and square up the four blocks all by hand.

Marking out the tenons.


Sawing the tenons.


Sawing the shoulders.


I usually stay about 1 mm away from the knife line with the saw and remove the rest by horizontal pairing ala Charlesworth.

That bit of waste next to the knife line also serves to protect the actual shoulders while I plane the cheeks of the tenons to it’s (almost) exact thickness. I use my Stanley no. 10 rabbet plane and a set square to achieve this.


A quick change of handle for my Lie-Nielsen chisel. I turned this pairing handle myself, which is one of the wonderful advantages of these socket chisels. The longer handle makes for more accurate and comfortable pairing.


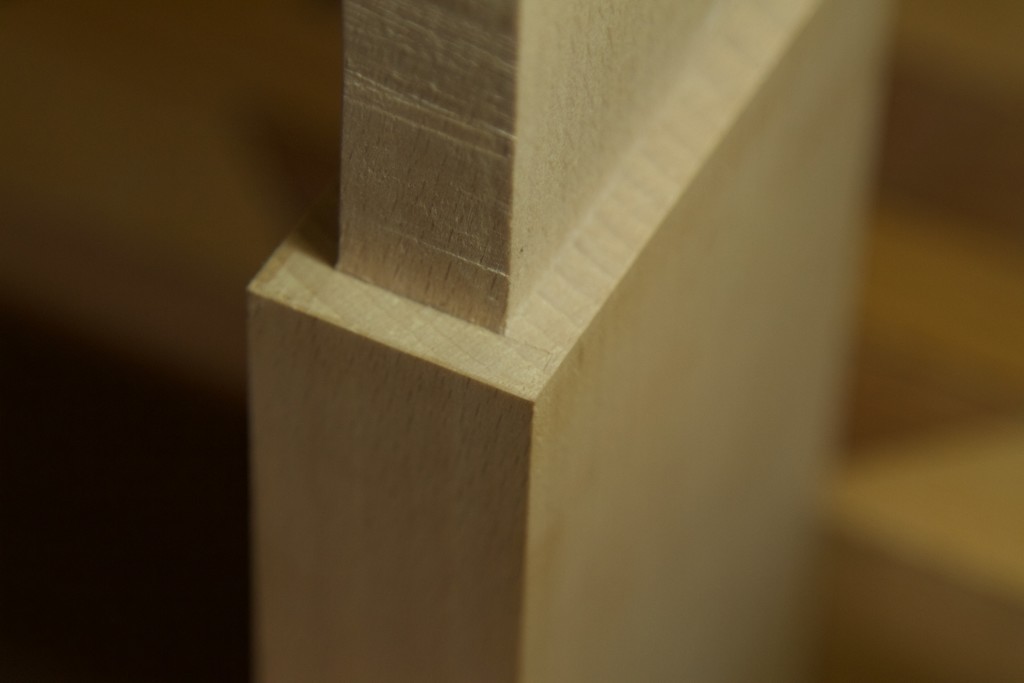
As you can see here, this Charlesworth method can be frightfully accurate.
This area was removed on the table saw. I am sure you will excuse me for not wanting to plane unnecessary by hand at this stage.

It got cleaned up with a Stanley number 78 rabbet plane. No sweat.


The mortises were first drilled out on the drill press and then fine tuned using a few chisels. The wood was simply to hard for my brace and Irwin auger bit, which is why I had to resort to the drill press.


8/2/2016


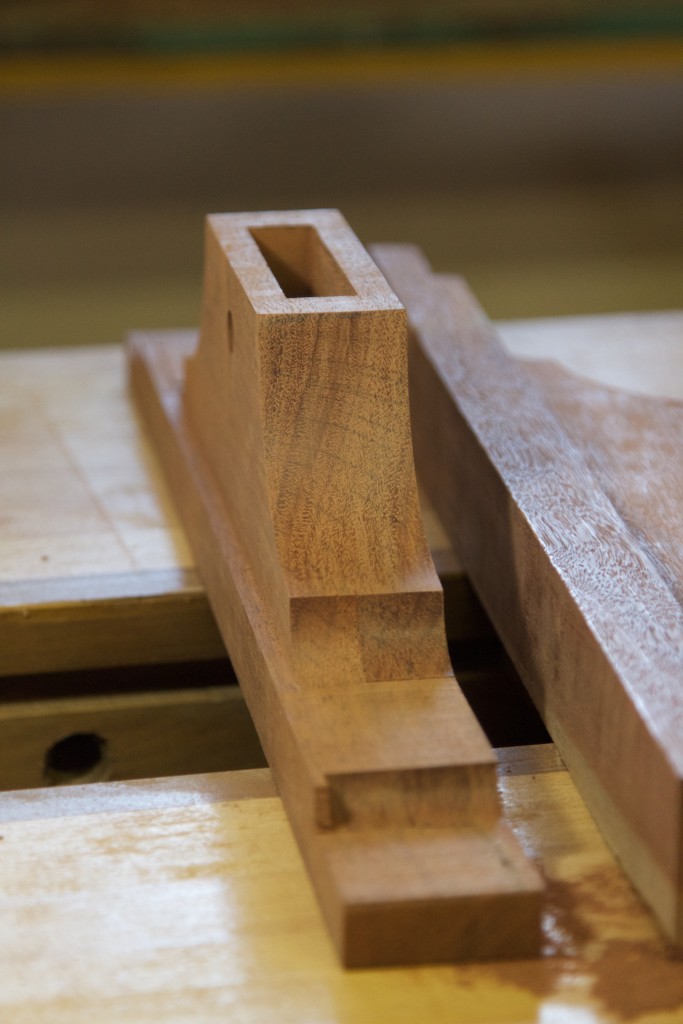
One of these elevated areas will become the actual jaw of the vise. The other was kept intact to make drilling these holes easier.


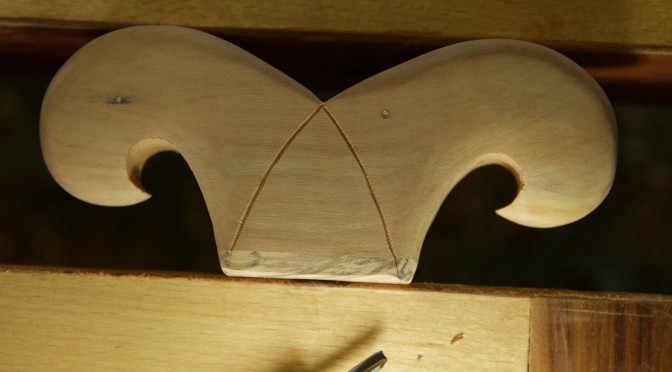
Here I am fine tuning the actual jaw surface. Jason dubbed it a “compound springjoint”. What that basically means is that you first remove a bit of timber from the bottom of the jaw to ensure that the first contact between the jaws occur at the very top of the vise. As the tention increase the slight distortion (bending) of the arms results in the entire jaw face clamping down on the saw plate.
Once that is accomplished you hollow out the length of the jaw by a smidgen. This in turn will ensure that the ends of the jaws make contact first. As the clamping pressure increase the small gap in the middle close up and you end up with even pressure across the whole length of the jaw faces.


The area I mentioned earlier that was left intact also helped to keep the jaws stable on the bandsaw for this operation. One of the curves were too acute for the bandsaw so I had to use my shop made bow saw.


At this stage the little area pictured had served it’s purpose and was removed by hand planing, (after an ice cold beer). You would also put ice in your beer if your shop averaged 33-35 °, trust me.


The table saw once again came in handy for this angled cut.

As you can see the table saw left nasty burn marks, which were removed by hand planing.


The second bevel were all done by hand planing.


Next came the so-called “leather hinge”. It is an appropriately sized block of wood with leather on both sides that keeps the arms parallel to each other. If you read Jason’s article it will become a bit clearer.


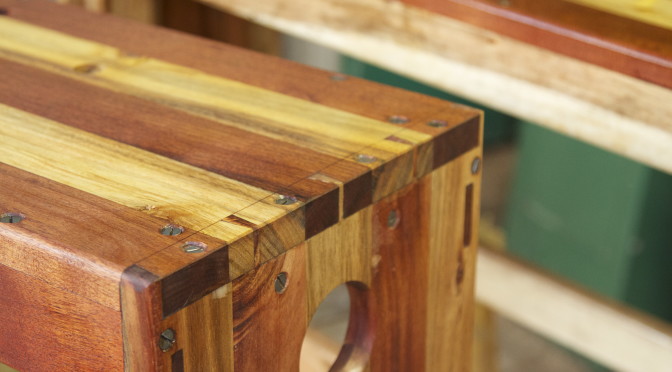
By the way, you might be able to see by how much I chose to “off-set” the draw pin holes. As it turns out this is slightly too much. I realised by doing this that for extremely hard wood like this one should use less. Nothing disastrous happened but if the off-set was anymore I would have destroyed many hours of toil during glue-up.

Here you can see the leather hinge and (as per usual) my hardware improvisation.


Unfortunately I did not take a photo of the crucial step of drilling the holes for the two bolts that pass through both arms and the leather hinge. I employed insert nuts to anker the bolts. I used to struggle with these insert nuts. They never used to seat nice and straight. That is until I made this incredibly complex insert-nut-inserter. You screw the insert nut onto the device with enough of a leading section of threaded rod which keeps the nut lined up and launch it with your cordless drill.


So why the title “The Fountainhead”? I happened to listen to an audio recording of this classic 1943 novel while working on this project. At some stage I realised that the saw vise actually resembles the head of a fountain.
Warning: This post will now deteriorate into a pseudo-philosophical discussion of literature rather than woodwork. Please refrain from reading any further if you are allergic to such quasi-intellectual drivel.
The novel seems to be quite relevant to the sentiments expressed by many woodworkers that forms part of the resurgence in handcrafted furniture. There seems to be an underlying theme that permeates through most of what is written online by the new generation of woodworkers. The theme can be seen as a reaction against consumerism (gone crazy), industrialisation and it’s decaying effect on quality. The Schwarz has in recent years linked it to American Anarchism.
Interestingly though, one of the main themes of the book is at odds with one of Christopher Schwarz’ ideas. He often argues that most designs that stood the test of time can probably not be improved on. I am particularly thinking of his ideas around workbench design. The main protagonist in the Fountainhead, Howard Roark challenges this idea with his approach to architecture. He is fiercely opposed to any form of copying. So it was with shock that I realised that I was pretty much copying Jason’s saw vise, which I usually do not like doing. Of course a workbench and a building is two different things, but it is interesting ideas to mull over on your journey towards your own philosophy. There are no rights and wrongs I am sure, just concepts to ponder over for woodworkers with a philosophical bent.
One more observation I made was extremely thought provoking. Probably the major theme portrayed through this story is that of individualism being more desirable than collectivism. According to the novel the individual should produce work that is true to themselves and original. They should not merely give the masses what they want, which is usually a slightly tweaked version of what has been done ad nauseum in the past. What seems to betray this prime philosophical stance of the book, is the fact that in true American style it has a fairly happy ending. In other words, what the masses want.
Anyway, I think that any modern woodworker can benefit from reading this book. It will get you to think about and challenge your beliefs around design and woodworking in general.
I conclude this post with a picture of a Shaft-tailed Whydah (bottom) and a Redheaded Finch (top) that came to visit my shop this weekend. We will hopefully finish the project in part two.

Like this:
Like Loading...