Finally, we embark upon the last stage of this adventure in looking at the chop (of the quick-release-vise), how the top was finished and a few examples of how the table assists with work holding. You will remember that work holding ability was one of the primary objectives behind the design of this table. The chapter concludes with a bit of a postmortem.
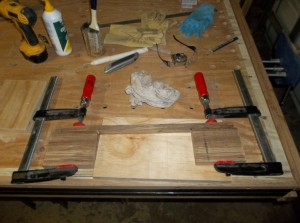
In the pictures below you can see how I put the chop of the quick-release-vise together. Again I used Ysterhout and created 4 square dogholes. In hind sight I made a mistake by laminating the pieces of wood between the doghole cross-grain to the rest. Since I made this chop-face the wood has moved enough to create approximately 2 mm difference at the top as well as the bottom, after starting off flush. This should not have been a surprise, but served as a useful reminder why it is generally discouraged. It does however not cause any functional limitations, but will probably lead to an immature demise of the chop. Time will tell.


Here you can see how I flattened the face of the chop with a belt sander. I did not have anything better for the job at the time. The wood is simply too hard for a normal handplane and I still did not have my Lie-Nielsen babies back then. Even the Lie-Nielsen’s at a bedding angle of 50° (York pitch) reject this wood as unpalatable.


Here I added purely cosmetic parts to the chop.

Initial shaping of the chop-face on the table saw.

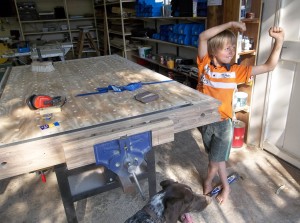
A quick dry fit before final shaping, with my son Didi acting as model together with our German Shorthaired Pointer called Nietzsche. Didi is doing his rendition of O-Ren Ishii (aka Cottonmouth) in Kill Bill.


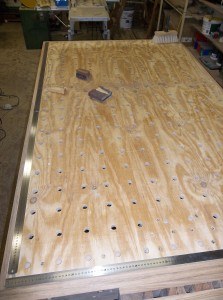
All the Ysterhout edges were fixed to the top standing proud by a millimeter or so. In the next pictures you can see how I brought everything into one plane by careful belt sanding. I know this is a kak idea, but I honestly did not have another option at the time. The second picture does at least show that I got it reasonably flat.


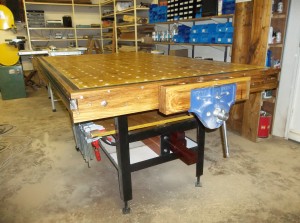
The next step was to glue in the steel ruler on two sides of the table. Although the ruler stop inside the Ysterhout edge, I set it up (by carefully removing the correct amount) so that the ruler show the measurement as of from the edge. This way I can have a stop flush with the edge, push a piece of stock against it and very quickly read the length or mark a measurement on it without having to fiddle with a tape-measure. You will remember how we recessed this area of the bench to ensure that the ruler sits flush with the top.
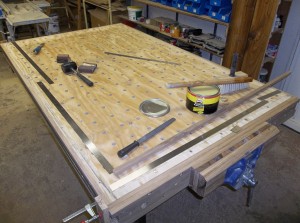


Then I started drawing lines corresponding to each 10 cm on the rulers. Every second line being green and the ones in between black. This makes it easy to count in 20 cm steps. The lines are square to the sides of the table and each other, which makes it easy to set up square guides for gluing panels.

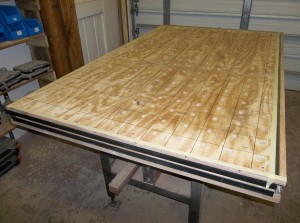
The plywood part of the top was then sealed with floor varnish in order to have a fairly hardwearing surface that is easy to clean when wood glue is spilled on it.


All the Ysterhout edges were treated with something called Woodoc, which as a local product that probably contains a mixture of oils. I assume it must be something like dried Linseed and/or Tung oil because it dries to a film on top of the wood after a few layers, but is easy remove or touch up if necessary. It certainly liberates the shear beauty of the Ysterhout.


… and voilà … the final product for your perusal!!!

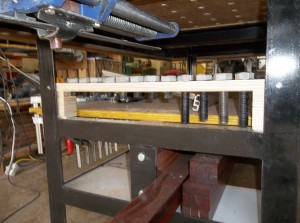
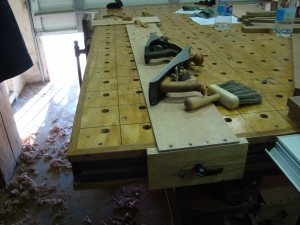
Here you can see where my benchdogs live. If you are interested to see how I made these, please please the post on Bench Bitches under the category Bench accessories.
I though I should include a few pictures illustrating how the bench assists with work holding.


In the next few pictures you can see how the T-channel (which can be accessed through any of the round access points rather than only the ends, as seen in the second picture) and benchdogs work in tandem to hold the two wide plane-stops in place for hand planing.


This was an immensely satisfying project, the result of which really improves the quality of my work and the amount of pleasure I get out of spending time in the shop. Having said that, I think it is important to always think about how one could improve your work. Therefore I thought it might be useful to consider what I have learnt while building and using this table.
The main problem I have found so far has to do with the table’s overhanging edges. I other words, not having legs in the same plane as the edge of the table. This combined with the fact that the table’s main frame is made out of steel rather than wood combines to create a less solid and noisy surface when using a chisel and mallet to chop mortises for example. Even at the top of the leg it does not feel or sound as good as on a proper wooden bench with massive wooden legs. I would not change the design of the table because of this, as the ultimate objective with this table is to have a dedicated assembly table and for such a table it is much better to have the legs out of the way to improve the ease of movement around it. It might actually help someone else building a similar table to consider different options depending on their needs. I have to bear with this shortfall until I build my dedicated bench.
The next thing I have noticed is that my table is a bit too high for hand planing. Again this would not necessarily change my design as I am currently bound by the height of my table saw as this assembly table doubles up as an out-feed table. It did however help me to understand what the people who knows are on about regarding this issue. When the table is too high you end up using your arms more than your legs, which means that your control deteriorates and you get tired much quicker. I can really recommend Christopher Schwarz’s discussion on this in his book “Workbenches: from design & theory to construction & use”.
The next issue would actually change how I do it if I had to do it again. Given that I am using it as a workbench in the interim, I think I should have used proper wood for the top rather than plywood. I would also increase the thickness of the top while doing so.
Finally, I think I should have borrowed a router (as I did not have one at the time) to do the dogholes with. That would have done a much better job in terms of getting the holes 100% square to the working surface.
I do hope that someone will be able to learn something from this or at least get a few ideas for their own table/bench.
Like this:
Like Loading...


